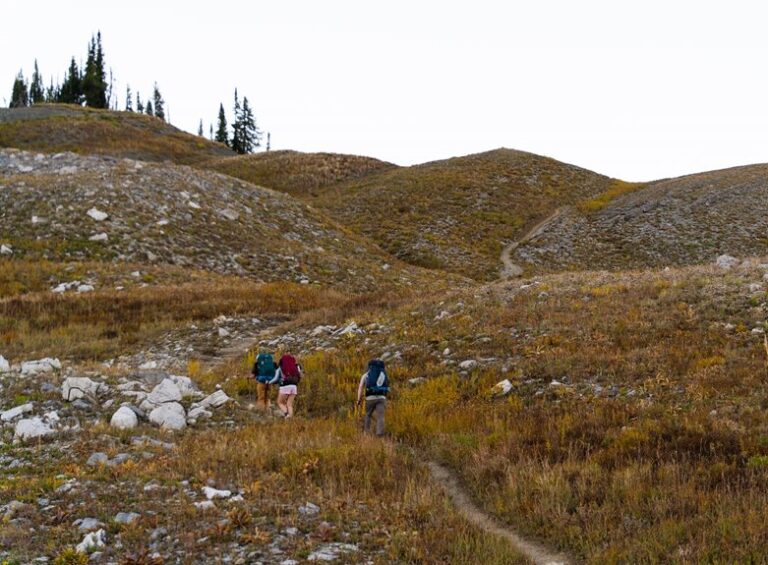


More than 300 million people visit U.S. national parks each year, so plan ahead to make the most of your trip. Check park alerts, weather, fees, and operating hours before heading out to avoid surprises. Map your route, confirm reservations, and pack plenty of water, snacks, sunscreen, and a basic first-aid kit. Leave no trace by packing out trash and staying on designated trails. A few smart preparations turn a hectic day into a relaxed, enjoyable visit.
Check National Park Alerts and Weather
Before you head into a national park, always check the latest alerts and weather, because conditions can change fast and catch you off guard. You’ll feel more prepared when you look at the park website, text alerts, or visitor center updates before you leave. These notices can warn you about trail closures, road problems, or dangerous conditions that could affect your plans.
Then, check the forecast for rain, wind, heat, or snow, since flash floods can turn a calm day into a risky one in minutes. Should the sky look unsettled, adjust your route and share your plan with someone you trust. That way, you can discover with confidence, stay connected to the park community, and protect the good day you came for.
Understand National Park Fees and Passes
Before you head in, check the entrance fee, because some parks charge per vehicle, while others charge per person or per day.
Should you plan to visit more than once, an annual pass can save you money and make future trips easier.
Also look for discounts and free days, since they can help you stretch your budget without missing the fun.
Entrance Fee Basics
National park entrance fees are usually simple once you know what to look for, and that little bit of planning can save you time and stress at the gate.
You’ll usually pay per vehicle, per person, or via bike, so check the park page before you leave. Some parks also use seasonal pricing, which means the cost can change during busy months.
Should you qualify, ask about senior discounts, since they can lower the price and make your trip feel more welcoming.
Many parks let you pay with a card or cash, but not every entrance station works the same way. So, read the fee details beforehand, keep your payment handy, and you’ll arrive feeling ready instead of rushed, like you already know the ropes.
Annual Pass Options
An annual pass can take a lot of the guesswork out of park fees, especially provided you plan to visit more than once in a year.
With an annual membership, you pay once and get access to many parks for the rest of the year. That can feel like joining a friendly travel club, because you’re part of the same park-loving crowd.
- Check which parks accept the pass
- Compare the price with single-entry fees
- Look for family options when you travel together
- Keep the pass handy at each entrance
- Renew before your next trip so you’re ready
Should you like weekend hikes or road trips, this choice can save time at the gate and help you focus on the views, not the wallet.
Discounts And Free Days
Sometimes the best way to make a park trip easier is to pay less, and that’s where discounts and free days can really help. Whenever you plan ahead, you can spot entry days whenever the park opens its gates at no cost, which leaves more room in your budget for food, gas, or a cozy campsite.
Provided you’re eligible, ask about Senior discounts, since they can lower your fee and make repeat visits feel much more doable. Next, check whether your park offers Volunteer opportunities, because helping out can sometimes come with perks and gives you a real sense of belonging. Also, some parks share special rates for families, students, or local residents. So before you go, read the park site closely and save yourself a little stress.
Pick the Best Time to Arrive
Beat the crowds through planning your arrival time with care. You’ll feel more relaxed whenever you choose prompt arrival or smart midweek timing, because the park often feels friendlier before the rush. Arrive soon after opening, and you can park easier, walk quieter trails, and enjoy cooler air.
Should mornings aren’t your style, pick a late afternoon visit whenever many day-trippers head out.
Keep these simple ideas in mind:
- Check sunrise and opening hours
- Aim for Tuesday through Thursday
- Leave extra time for parking
- Bring water so you can settle in
- Watch weather and road updates
With a little planning, you’ll join the park at its best pace and slip into the experience like you belong there.
Know the Main Park Rules
Before you head out on the trails, check the park rules so you know what’s allowed and what isn’t.
You’ll also need to keep a safe distance from wildlife, since that helps protect both you and the animals.
And in case the park asks for permits or limits access to certain areas, make sure you have what you need before you go.
Park Regulations
Whenever you follow the park rules, your visit feels easier, safer, and a lot more relaxing. You also fit right in with other respectful visitors, which makes the whole day feel friendlier.
Start with the basics: check trail permits before you head out, because some routes need advance approval.
Then review drone restrictions, since many parks ban them to protect the quiet and shared space everyone came to enjoy.
- Stay on marked paths.
- Read signs at every stop.
- Pack out all trash.
- Use campfires only where allowed.
- Follow posted hours and closures.
As soon as you treat rules like part of the expedition, you help keep the park welcoming for everyone. Small choices like these show you belong there too, and they make your trip smoother from the initial step to the last.
Wildlife Distance Rules
At the edge of a trail or beside a quiet lake, wildlife distance rules help you enjoy the park without stressing the animals. You’re part of the park community when you give deer, elk, bears, and birds plenty of room.
Keep reading distance signage, because those signs tell you how far to stay back for safe viewing. Should an animal change direction, raise its head, or move away, you’re too close. Back up slowly and let it settle. Use binoculars or a zoom lens so you can still feel close without crowding the moment.
Never feed wildlife, even assuming it looks friendly, because food changes behavior and can put everyone at risk. Whenever you respect space, you protect the animal, your group, and the trail for everyone.
Permits And Access
After you’ve given wildlife plenty of room, the next thing to check is whether you even need a permit to be where you want to go. That step can save you stress and help you feel ready.
- Look up trail permits before you leave.
- Check should timed entry apply.
- Ask about permit transfers should plans change.
- Carry your ID and confirmation.
- Read the main park rules for your route.
Some areas need day-use passes, while others limit group size or camping spots. So, should you’re heading in with friends, make sure everyone knows the rules and stays on the same page. Park staff want you to have a smooth visit, and a quick check now can keep your trip feeling easy, welcome, and worry-free.
Plan Your Route and Top Stops
A little planning goes a long way whenever you visit a national park, and your route can shape the whole day. You’ll feel calmer whenever you map your main loop initially, then mark scenic viewpoints and a few detour attractions that fit your pace. Use this simple guide:
| Stop | Why it matters | Feeling |
|---|---|---|
| Trailhead | Starts your day strong | Ready |
| Overlook | Gives you a shared wow moment | Connected |
| Waterfall | Breaks up the drive | Refreshed |
| Visitor center | Answers fast questions | Confident |
Next, group stops that sit close together so you spend more time outside and less time turning around. In case the park feels big, choose one anchor area and build around it. That way, you and your group can move with ease, stay present, and enjoy the park together.
Pack the Right Gear
Before you hit the trail, pack an essential gear checklist so you’ve got the basics covered without the last-minute scramble.
You’ll want items like water, a map, snacks, a primary aid kit, and a charged phone, since small problems feel much bigger once you’re tired.
Then choose weather-ready clothing, because layers, a rain jacket, and sturdy shoes can keep you comfortable as the park changes fast.
Essential Gear Checklist
Packing the right gear can turn a good park trip into a great one, because you feel ready instead of rushed the second you hit the trail.
Build your kit around comfort and safety, and you’ll fit right in with other prepared visitors. Bring these camping essentials:
- water bottle and snacks
- map and compass
- initial-aid kit
- flashlight or headlamp
- small trash bag
These route-finding tools help you stay on track whenever signs are sparse or the path splits. Keep your gear in one easy-to-grab pack, so you can leave quickly and move with confidence. A few smart items do more than fill space. They help you relax, enjoy the scenery, and feel like you belong out there, not just passing through.
Weather-Ready Clothing
Weather can change fast in a national park, so your clothes need to keep up with it. Choose a layering strategy that lets you add or remove pieces without hassle.
Start with moisture wicking fabrics next to your skin, since they pull sweat away and help you stay dry. Then add a warm middle layer, like fleece, for cool mornings.
Finally, pack a light rain shell or windbreaker, because the sky can switch moods in minutes. Wear sturdy pants and socks that dry fast, so wet trails don’t ruin your day.
Also, bring a hat and gloves should you visit higher spots. Whenever you dress this way, you join the smart hikers who stay comfortable, calm, and ready for whatever the park sends your way.
Prepare for Wildlife Encounters
Because wildlife can appear just as you least expect it, you’ll want to plan for those moments with calm, smart habits. Stay alert on trails and give animals plenty of space so you help avoid habituation and protect the park’s balance. Whenever you notice movement, choose silent observation and keep your group steady.
- Store food in sealed containers.
- Never feed or touch wild animals.
- Back away slowly whenever an animal approaches.
- Keep pets close and leashed where allowed.
- Follow ranger signs and local warnings.
These simple choices help you feel confident and welcome in the wild. Should you travel with kids, teach them to watch quietly and stay near you. A little respect goes far, and it lets everyone share the same beautiful space safely.
Find Parking and Shuttle Options
Finding a parking spot or catching the park shuttle can take a little planning, but it usually saves you a lot of stress once you arrive. Check the park website before you leave, because lots can fill sooner on busy days.
Should you get there late, look for overflow parking and follow signs to the nearest lot. You can also use remote dropoffs should the park offer them, which keeps traffic moving and gets you closer to the main area.
Whenever you ride the shuttle, keep your group together, hold onto your day pack, and be ready to hop on the next one. This helps you feel confident and welcomed, even on crowded days.
With a little patience, you’ll move through the park like you belong there.
Stay on Trails and Protect the Park
Once you’re on the trail, staying on it does more than keep you from getting lost. It helps you practice trail etiquette and shows respect for the people and wildlife who share the park with you.
- Follow marked paths, even whenever shortcuts look easy.
- Keep noise low so others can enjoy the quiet.
- Give space to plants, animals, and other hikers.
- Watch for signs that protect sensitive habitats.
- Leave no trace by taking all trash with you.
- Stay away from cultural sites unless a ranger says it’s okay.
Whenever you keep your boots where they belong, you help protect the place for everyone. That small choice says, “I’m part of this community too,” and that feeling matters.
Bring Enough Food and Water
Pack a little extra food and water before you hit the trail, and you’ll give yourself a much easier day.
You never want hunger or thirst to steal the fun from your walk.
Bring packable snacks like trail mix, fruit, or granola bars so you can refuel without slowing down.
For water, use hydration strategies that fit your route, like filling bottles at the start and carrying a small backup container.
Should the day feel warm or the trail climb, sip often instead of waiting until you’re dry.
You’re part of the park community once you plan well, because that keeps your pace steady and your mood up.
A little prep helps you stay comfortable, confident, and ready to enjoy every view.
Know What to Do in an Emergency
Provided that something goes wrong on the trail, staying calm can help you believe clearly and act fast. You’re not alone out there, and your group can work together.
To start, tell someone your plan before you head out. Then keep these steps in mind:
- Check for danger and move to safety.
- Use your phone or whistle to call park SOS.
- Share your location and trail name.
- Save emergency contacts in your phone and on paper.
- Stay with your group unless someone must get help.
If you feel scared, breathe slowly and speak clearly. Rangers want to help you, and quick, simple info makes a big difference.
Keep your map handy, because it can guide rescuers fast. Together, you’ll handle the moment with care.
Plan for Reservations and Entry Limits
Before you head to the park, check whether you need a reservation or timed entry, because some popular places fill up fast. You can feel more relaxed whenever you book promptly and know your spot is set.
Look at the reservation windows initially, since each park opens them at different times. Then confirm the rules for capacity planning, because staff use them to keep trails and lots from getting crowded.
In case plans change, check for a virtual waitlist so you can still get in without stressing. You don’t have to guess or race the clock alone.
With a little prep, you and your group can arrive ready, share the space kindly, and spend less time worrying about the gate and more time enjoying the outing together.
Make the Most of Sunrise and Sunset Spots
Sunrise and sunset can turn an ordinary park visit into something you’ll recall for a long time. You’ll feel like you belong there provided you plan for the golden hourcomposition tips and move with the light.
- Arrive beforehand and find your spot before crowds gather.
- Check trail times so you’re not hurrying in the dark.
- Use silhouette photography techniques near ridges, trees, or water.
- Face the sun to catch warm color, then turn for soft side light.
- Pack a small headlamp, layer, and water for comfort.
After that, stay quiet and watch how colors shift across the sky. You’ll notice that a simple rock, pine, or lake can look special when the light changes.
Should you be with friends or family, share the view and give everyone a turn with the best angle.
Frequently Asked Questions
Are Pets Allowed on Any Park Trails?
Yes, some park trails allow leashed pets, but many do not, so you will need to check each park’s rules. Service animals are usually welcome. You will be more comfortable once you plan ahead and respect posted restrictions.
Can I Camp Overnight Without a Reservation?
Sometimes, yes. You can camp overnight without a reservation, but only in designated first arrival sites. Check rules beforehand, follow campfire etiquette, and practice leave no trace so you’ll feel right at home outdoors.
Are Drones Permitted Inside National Parks?
No, you usually can’t fly drones in national parks. You must follow strict flight regulations and respect privacy. Check each park’s rules before you go so you will feel confident and included.
Is Cell Service Available Throughout the Park?
Not always; you’ll often find spotty cell coverage or none at all, so plan like a savvy trail family. Bring satellite phones for remote areas and you’ll stay connected without missing the park’s welcome.
Where Can I Refill My Water Bottle?
You can refill your water bottle at refill stations near visitor centers, trailheads, and campgrounds. If you will be crossing creek crossings, plan ahead since natural water is not always safe. Stay hydrated and connect with your park community.