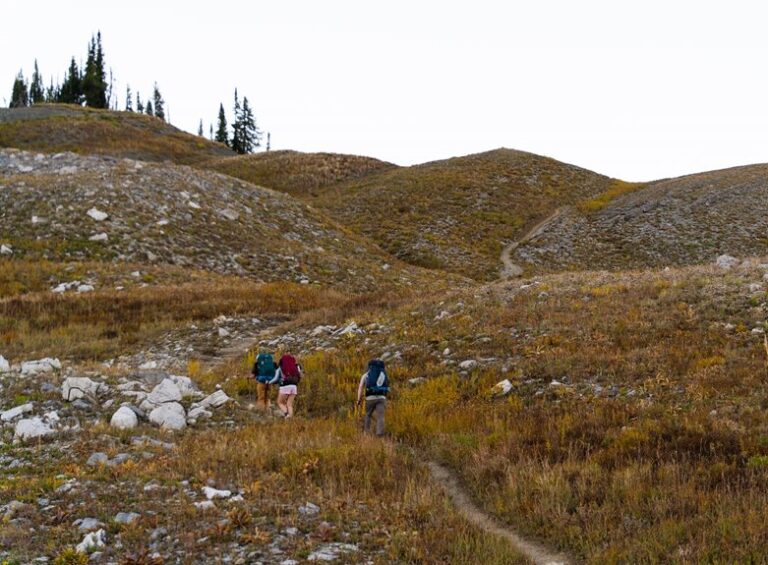

Hiking safely starts with basic planning and common-sense choices. Pick an easy trail, check the weather forecast, and tell someone your route and return time. Pack essentials like water, snacks, a map, a headlamp, and a first-aid kit. Dress in layers suited to conditions and monitor pace and hydration on the trail. Learn basic emergency steps—staying put if lost, signaling for help, and treating minor injuries—so a small problem stays small.
What to Pack for Hiking Safety
Before you hit the trail, pack with care so you can stay safe, calm, and ready for small surprises. You’re part of the hiking crew now, so begin with water, a snack, and a light layer for changing weather.
Add initial aid basics like bandages, wipes, and any medicine you need. Keep route-finding tools such as a map, compass, or phone with a full battery, because getting turned around can shake anyone’s confidence.
Then tuck in a whistle, flashlight, and sun protection. These small items do a lot whenever plans shift.
Next, use a sturdy pack that fits well, so you can move easily and keep everything close. Whenever you prepare this way, you give yourself a safer, steadier start and more room to enjoy the walk.
Choose a Beginner-Friendly Trail
When you pick a beginner-friendly trail, begin with a short route so you can build confidence without wearing yourself out.
Stick to easy terrain with gentle hills and clear paths, because your initial hikes should feel steady, not stressful.
Before you go, check current trail conditions so you don’t get surprised by mud, closures, or tricky spots.
Trail Length Matters
A short trail can make all the difference, especially in case you’re just getting started, because it lets you ease in without feeling worn out right away. Whenever you pick a smaller route, you can judge your pace better and keep your distance awareness sharp.
That helps you notice how your body feels before you get too far from the trailhead. You’ll also have room to enjoy the walk with your group, instead of racing against the clock.
Start with a loop or out-and-back that feels doable, so you can build trust in yourself. Should you finish with energy left, that’s a win, not a tease. Next time, you may stretch a little farther and still feel like you belong out there.
Easy Terrain First
Choose a beginner-friendly trail with easy terrain so your initial hike feels steady, not stressful. Once you handle trail selection well, you’ll feel like you belong out there, not like you’re crashing the party. Pick paths with gentle inclines and easy wayfinding, because simple routes let you build confidence without rushing.
- Begin with short loops that match your pace awareness.
- Choose marked paths so you can focus on the view, not guesswork.
- Look for wide, even ground that keeps each step calm and sure.
As you walk, stay relaxed and notice how your body responds. A friendly trail gives you room to learn, breathe, and enjoy the moment.
That initial easy hike can turn nerves into satisfaction, one step at a time.
Check Trail Conditions
Before you head out, check the trail conditions so your hike feels safe and calm from the start. You can choose a beginner-friendly trail, but weather, closures, and muddy spots still matter. Look for trail updates on park websites, local apps, or maps before you leave.
Then read ranger notifications, because they often warn you about washed-out paths, steep snow, or wildlife activity. Should the trail look crowded or rough, pick a gentler route nearby. You’re not giving up; you’re being smart and kind to yourself.
Also, match the trail to your energy, shoes, and daylight. Once you prepare this way, you join the trail with confidence, and that feels a lot better than guessing halfway up a hill.
Tell Someone Your Hiking Plans
Before you head out, tell someone your hiking plans so they know where you’re going and which route you’ll take.
Share your expected return time too, because that simple detail can make a big difference should you be delayed.
Also leave emergency contacts with that person, so help can reach the right people fast should you require it.
Share Route Details
Give your plans a quick handoff to someone you trust so your hike doesn’t become a mystery trail. Share the exact path you’ll follow, and point out the trailheads, loops, and side routes you might try.
Provided you expect to check water sources, say where those stops are. Should you’ve looked at cell coverage mapping, mention the dead zones too, so your contact knows where silence is normal. That little bit of detail helps your person feel ready, not worried.
- Send a map screenshot or trail name.
- Mark your parking spot and key landmarks.
- Tell them who’s hiking with you, in case anyone.
When you share the route clearly, you give your people a simple way to support you and stay connected.
Set Return Time
Once you’ve shared your route, tell someone exactly at what time you expect to be back, because that small detail gives your plan a clear finish line.
Whenever you set expectations, you help your people know when to start feeling concerned, and that can bring real peace of mind. Choose a time that fits your pace, then add a little extra room for slow steps, photo stops, or muddy trails. That way, you don’t feel rushed, and your friend or family member can trust the plan.
Should you hike with a group, agree on one return time together so everyone stays on the same page. You can also establish a deadline for checking in before dark. Clear timing keeps your hiking circle connected, cared for, and ready to notice whenever something feels off.
Leave Emergency Contacts
Your hiking plan should include more than a trail name and a return time. Tell a trusted person where you’re going, who’s with you, and whenever you expect to be back. That small step helps your people stay calm should plans change.
- Share your route, trailhead, and parking spot.
- Give one main phone number, then a backup.
- Set a clear emergency protocol, like whenever to call search help.
Next, make a contact hierarchy. Put your hiking buddy initially, then a family member, then a friend who checks messages often. Also share car details and any medical needs that matter in a hurry.
In case you do this, you’re not being dramatic. You’re building a safety net, and that feels good.
Check the Weather and Trail Conditions
Before you lace up and head out, take a minute to check the weather and trail conditions so the hike doesn’t surprise you later.
Look at seasonal forecasts initially, because mountain weather can flip fast, and a sunny start can turn into rain, wind, or lightning.
Then check the trail report from the park or ranger station. You want to know about mud, downed trees, or closures before your crew gets stuck guessing.
Should your route has river crossings, read the latest updates carefully, since water can rise and make a simple crossing unsafe.
Whenever you share this info with your hiking buddy, you both feel more prepared and calm. That little check helps your group move together with confidence, and it keeps the fun in the day.
Wear the Right Hiking Clothes
Pull on the right layers, and you’ll give yourself a much easier hike. Whenever you dress with care, you fit in with other hikers and feel more at ease on the trail. A smart layering strategy helps you stay comfortable as the day changes.
- Start with a soft base layer that moves sweat away from your skin.
- Add a warm middle layer, like fleece, for cooler air.
- Finish with a light outer layer that blocks wind and light rain.
Your fabric choices matter too. Pick quick-drying materials and skip cotton, which stays damp and heavy. Also, wear socks that cushion your feet and reduce rubbing. Whenever your clothes work with your body, you can focus on the path, breathe easier, and enjoy the hike with confidence.
Stay Hydrated and Bring Snacks
You need water before you feel thirsty, so keep sipping through the hike to stay steady and alert.
Pack a bottle or hydration bladder that fits your trip, and choose snacks like nuts, fruit, trail mix, or energy bars that give you quick and lasting fuel.
Whenever you drink soon and eat smart, you help your body keep up with the trail and make the whole hike feel a lot easier.
Hydration Essentials
A little planning goes a long way on the trail, and hydration sits at the center of it. You want to start with pre hike sipping, because your body does better whenever it isn’t catching up later.
Pack enough water for the full trip, then take small drinks often instead of waiting until you feel dry. That steady habit helps your energy and supports electrolyte balance, especially as the sun works harder than you do.
- Drink before you leave.
- Sip at regular stops.
- Watch for a thirsty mouth, a tired head, or a foggy mood.
Bring easy snacks too, so your drink breaks feel like a team effort and you stay steady with the group.
These simple steps help you feel cared for on every mile.
Smart Snack Choices
Smart snacks can keep your energy steady, and they make your water work better too.
Whenever you hike, pack foods that travel well and feel easy to eat on the trail. You can grab energy bars for quick fuel, then add fruit leather for a sweet lift that won’t weigh you down. Pair them with nuts or crackers, and you’ll avoid that shaky, hungry feeling that can sneak up fast.
Also, keep snacks where you can reach them without unpacking everything. That small habit helps you stay with your group and keeps the mood light.
Before you head out, choose foods you actually enjoy, because a happy hiker is usually a stronger hiker.
Use a Map and Download Offline
Before you step onto the trail, map out your route and save it for offline use so you’re not relying on a weak signal at the moment it matters most. Whenever you join the trail crew in spirit, you give yourself calmer offline guidance and fewer “uh-oh” moments.
- Download the full route and check for map backups before you leave.
- Mark trailheads, water stops, and turns with waypoint labeling so you can find them fast.
- Protect your battery management by lowering screen brightness and closing extra apps.
Then, in case your phone acts moody, your map still works. You can glance down, confirm your spot, and keep moving with confidence. That kind of simple prep helps you feel like you belong out there, even on your initial hike.
Pace Yourself on the Trail
Now that your route is saved and your phone is ready, you can focus on something even more vital: keeping a steady pace that feels good for your body. You don’t need to race anyone. Hikers belong on the trail at their own speed, and that’s enough. A steady cadence helps you stay relaxed, save energy, and enjoy the view. Match your breathing rhythm to your steps, and slow down whenever you can’t speak comfortably.
| Pace | Feeling | What to do |
|---|---|---|
| Too fast | Breathless | Ease up |
| Steady | Calm | Keep going |
| Too slow | Stiff | Warm up |
If you feel strong, resist the urge to sprint ahead. Instead, take small breaks, sip water, and notice how your body responds. Whenever you move with care, you’ll feel more confident and more connected to the group around you.
Spot Common Trail Hazards
Trail dangers can sneak up fast, so it helps to keep your eyes open and scan ahead as you walk.
You don’t need to feel nervous; you just need to notice what the trail is telling you.
Look for rocks, roots, mud, and steep edges, because each one can trip you up.
Whenever you hike with others, sharing what you see can keep everyone in the loop and feeling confident.
- Watch for loose stones and wet logs.
- Pay attention to wildlife encounters and give animals space.
- Practice erosion awareness near washed-out paths and crumbling banks.
If the ground looks uneven, slow down and pick a safer line.
Small choices like that help you stay steady and part of the hiking crowd that looks out for one another.
What to Do If You Get Lost or Hurt
Should you get lost or hurt, the most vital thing is to stay calm and stop moving for a moment so you can consider clearly. Take a slow breath, check your map, and look for familiar landmarks. In case you can, retrace your steps to the last place you knew.
Whenever you need help, use emergency signaling with a whistle, bright clothing, or three sharp shouts. Provided you’re hurt, sit down and check the injury. Clean small cuts, keep pressure on bleeding, and use improvised splinting for a possible sprain or broken bone.
Then stay warm, drink small sips of water, and save your phone battery. You’re not alone out there, and smart actions can help rescuers find you faster.
Stay Safe on Solo Hikes
Hiking alone can feel peaceful and freeing, but it also asks more of you, so a little extra care goes a long way. Whenever you head out solo, share your route and return time with someone you trust. That simple step helps your people feel calm, and it keeps you connected.
Then follow these habits:
- Stay on marked trails and check signs often.
- Practice Solo etiquette by greeting others kindly and keeping your pace steady.
- Carry an Emergency whistle where you can reach it fast.
You should also trust your gut. Should a spot feel off, turn back without guilt.
Solo hiking works best whenever you stay alert, plan well, and respect the trail around you.
Protect Yourself From Sun and Bugs
Sun and bugs can turn a great hike into a rough one in case you don’t plan ahead, but fortunately a few simple habits can keep you comfortable and protected.
Start with sun protection by wearing a hat, sunglasses, and breathable clothing that covers your skin. Put on sunscreen before you leave, then reapply it as needed, especially after sweating.
Next, use insect repellents on exposed skin and your clothes, following the label so you stay safe and effective. Should you can, choose lighter colors and avoid strong scents that attract bugs.
Also, check your skin and gear during breaks so you catch bites sooner. With a little care, you’re able to join the trail crowd feeling ready, calm, and far less scratchy.
Build Confidence With Short Hikes
Once you’ve handled sun and bug protection, the next smart move is to start small and build your trail confidence one easy hike at a time.
Choose local loops and easy daytrips with clear signs, steady ground, and short distances. That way, you can learn your pace without feeling rushed or lost.
- Pick a route near home so you can leave should you need to.
- Tell a friend where you’re going, then hike with someone who feels encouraging.
- Pack light, bring water, and notice how your body feels.
As you repeat these short outings, you’ll start to trust your feet, your timing, and your choices.
Little wins matter. They help you feel like you belong on the trail, not just visiting it. Before long, longer hikes won’t seem so scary.
Frequently Asked Questions
How Do I Know if I’M Physically Ready for a Hike?
You’re ready if you can comfortably walk briskly for 30 to 60 minutes, climb stairs, and recover quickly. Check fitness benchmarks and then use gradual conditioning to build strength and confidence so you feel part of the trail community.
What Should I Do Before My First Overnight Hike?
An ounce of prevention is worth a pound of cure: you should pack a gear checklist, study route planning, tell someone your plan, trial your supplies, and join seasoned hikers for confidence before you head out.
How Can I Tell if a Trail Is Too Advanced for Me?
You can tell a trail is too advanced if signage or trail indicators show steep elevation, long mileage, or exposure beyond your comfort, and your gear does not match the route leaving you underprepared. Trust your pace and choose beginner friendly routes.
Do I Need Hiking Poles as a Beginner?
You don’t need hiking poles as a beginner, but they can help with balance, reduce knee strain, and enhance confidence. Try them in case you want extra support; choose comfortable grip options and enjoy the trail community.
When Is It Safe to Hike With Children?
When is it safe to hike with children?
You can hike with children once they can follow simple instructions and stay close, usually around the age limits set by your trail. Use close supervision strategies, and you will both belong on paths lit like adventure’s initial dawn.