
Outdoor survival skills keep panic low and choices smart during unexpected situations. Learn to read terrain and pick or build shelter before weather or darkness closes in. Find and purify water using basic filtration, boiling, or chemical treatments. Start and control fire safely for warmth, cooking, and signaling without causing hazards. Practice food safety, hazard avoidance, and layering warmth so skills work together in real situations.
Outdoor Survival Basics You Need First
Before you head into the wild, start with the basics that keep you calm, safe, and ready to contemplate clearly. You need a few habits that work together. Initially, check weather, trail plans, and your gear so you don’t walk in blind.
Next, build situational awareness by noticing sounds, light, terrain, and changes around you.
Then use mental mapping to track where you are, where you came from, and which landmarks can guide you back.
Also, tell someone your route, even though it feels a little boring.
Keep your energy steady through drinking water, moving with purpose, and avoiding panic.
Ultimately, trust small signals from your body and your surroundings. Whenever you practice these basics, you join a smarter, calmer outdoor mindset.
How to Find Shelter Fast
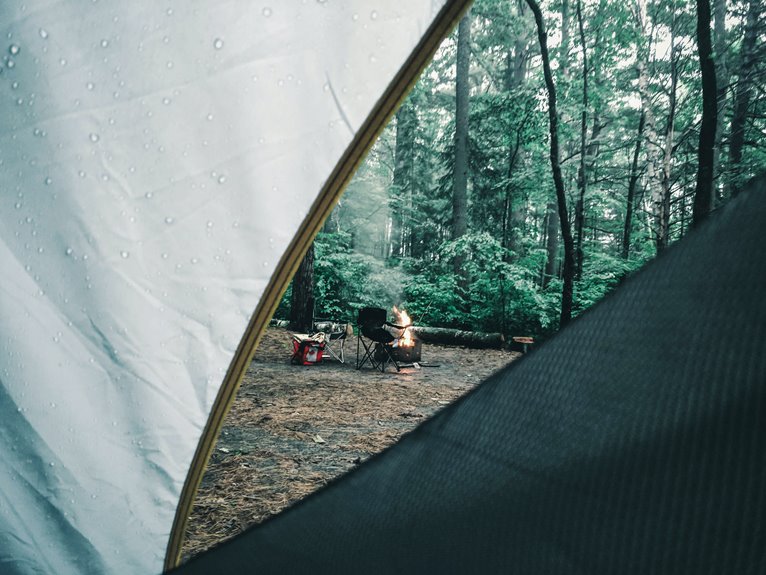
As soon as you need shelter fast, every minute counts, so your initial job is to get out of the wind, rain, or cold and pick a spot that gives you some protection immediately. Look for a low, dry place near a rock face, thick trees, or a fallen log, but avoid loose branches and flood-prone ground.
Then use what you’ve got. A tarp, rain jacket, or emergency blanket can become quick tarpaulin rigs, and even a simple improvised bivvy can trap warmth better than open air.
Next, face the opening away from the wind and keep your body small inside the space. Should you be with others, work together and share gear. That teamwork can turn panic into comfort fast.
How to Find Safe Water
Whenever you need water in the wild, look for reliable sources like springs, flowing streams, and clear runoff after rain.
Stay away from stagnant puddles, dead animals, and water near obvious contamination, because they can make you sick quickly.
Once you find water, purify it using boiling, filtering, or employing clean treatment tablets so you can drink with more confidence.
Locate Reliable Water Sources
A dependable water source can feel like a small miracle in the wild, and finding one sooner can ease a lot of fear. You don’t have to wander blindly; read the land like a teammate would. Look for green growth, animal trails, low spots, and shaded rock seams. These clues often point to seasonal springs or collected moisture.
- Check valleys after rain.
- Watch for dew collection on grass at dawn.
- Follow birds moving toward cover.
- Notice insects and frogs near damp ground.
Once you spot a likely place, move carefully and save your energy. Stay calm, trust your eyes, and keep asking, “What seems alive here?” That simple habit helps you find water with more confidence and less stress.
Purify Water Safely
Finding water is only half the job; making it safe is what protects your body from a hard lesson in the woods.
You can’t trust clear water just because it looks friendly. Initially, strain out dirt and leaves with cloth, then heat it until it boils hard for one minute. Should fire be low, use solar pasteurization in a clear bottle in strong sun.
For colder, cloudy water, add another step for mineral removal when possible, since grit can hide germs and make treatment less reliable.
After that, store the water in a clean container with a tight lid. Keep your hands out of it, and don’t dip from a shared cup.
Whenever you and your group handle water carefully, everyone stays steadier, safer, and ready for the next trail.
How to Purify Water in the Wild
Whenever you need safe water in the wild, you should clean it as much as you can prior to you treat it.
Start by filtering out sand, leaves, and grit, then boil the water safely to kill germs or use chemical purification tablets should fire not be an option.
With the right steps, you can turn murky water into something much safer to drink and feel a lot calmer doing it.
Boiling Water Safely
Over a small campfire or stove, boiling water can turn risky water into something much safer to drink, but only provided you do it the right way. You belong out here, and this simple skill can steady you whenever supplies run thin. Use a hard rolling boil and keep it going for at least one minute; at higher elevations, aim for three. These boiling techniques help reach the temperature targets that kill harmful germs.
- Choose a pot with a lid.
- Heat until big bubbles rise nonstop.
- Start timing after the boil begins.
- Let the water cool before you sip.
Stay patient, because rushing can leave you uneasy later. Should you follow these steps, you protect yourself and help your group feel safer.
Filtering Sediment First
Before you try to make wild water safe, you need to strip out the grit that clogs the whole process. Initially, let cloudy water rest in a container so heavier bits sink.
Then pour it through a clean cloth, bandanna, or coffee filter for sediment sieving. This simple step helps you reach clearer water faster, and it saves your filter from getting swamped.
In case you need a quick backup, build an improvised prefilter with layered fabric, grass, or fine mesh held over another container. You can repeat the pour provided the water still looks muddy.
Keep your gear clean, because dirt from one batch can jump into the next. While you work this way, you protect your next purification step and give your group a better shot at safe water.
Chemical Purification Methods
Once you’ve cleared out the grit, you can move on to chemical purification to make the water safer to drink. You’re not alone out there, and these steps help your crew stay steady and smart. Use the right dose, then wait the full time.
- Drop in chlorine tablets and let them work.
- Use iodine tincture only as directed.
- Stir the water so the chemical spreads.
- Wait before you sip, even provided you’re thirsty.
Clear water can still carry tiny germs, so don’t rush. In the event the water looks cloudy again, filter it once more initially. Also, keep your bottle cap clean so you don’t undo your good work.
At the moment you handle chemicals carefully, you give yourself and your group a better chance to drink with confidence in the wild.
How to Build a Fire
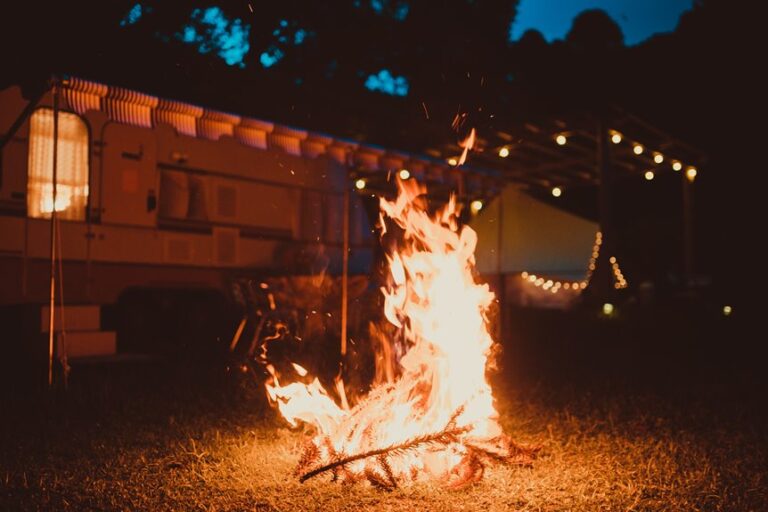
A good fire can turn a rough night in the wild into something you can manage, so it helps to know how to build one the right way. To begin, gather dry tinder, kindling, and larger wood, then shape them into a loose teepee so air can flow. Place your spark placement low and close to the tinder, because a tiny start needs a fair shot. Once it catches, feed it slowly and keep ember management steady so the heat grows without choking itself.
| Fire need | What you do |
|---|---|
| Gentle start | Use fine tinder |
| Strong middle | Add kindling slowly |
| Lasting warmth | Keep coals fed |
When you stay calm and work with the fire, you help your group feel safer and more at home.
How to Start a Fire Without a Lighter
Before you strike anything, you need dry tinder that catches fast, like bark shavings, grass, or cottony plant fluff.
Then you can pair that tinder with a friction fire method, where steady rubbing creates the heat you need for an ember.
Provided you keep your materials dry and your hands steady, you give yourself a real shot at getting that initial flame.
Fire Tinder Basics
Whenever you need to start a fire without a lighter, your tinder becomes the quiet hero that can make the whole effort work. You want it dry, fluffy, and easy to spark, so your spark or ember has a chance to grow. Should you be with friends, you can build confidence fast by choosing smart materials together.
- Use dry fungal tinder for steady catching.
- Try commercial tinderheads when weather feels damp.
- Mix bark shavings with fine grass.
- Keep tinder tucked in a dry pocket.
Then shape a loose nest and place kindling nearby. Your job is to help heat stay close, not smother it. In the event one piece fails, don’t panic. You’re learning the same steady skill many campers trust, and that shared know-how makes the whole group stronger.
Friction Fire Methods
Friction fire methods can feel a little like trying to wake up a stubborn campfire from a nap, but once you understand the basics, they make more sense. You’re not alone provided it feels tricky initially; everyone starts with shaky hands and a little doubt.
| Method | Best Use |
|---|---|
| Hand drill | Dry, soft wood and patient pressure |
| Fire plow | Faster spark making with firm strokes |
| Bow drill | More control and less hand strain |
With the hand drill, you spin a straight stick fast in a soft board until a coal forms. The fire plow works through rubbing a stick into a groove to build heat. For both, keep tinder ready, stay steady, and breathe through the effort. Once the ember appears, you’ve earned the glow.
How to Navigate Outdoors
At the time you’re outdoors and the trail starts to feel uncertain, good wayfinding can keep a scary moment from turning into a real problem. You don’t need magic, just calm habits that help you stay connected to your group and your route. During the day, notice ridges, water, bends, and open areas, then keep checking where you’ve been.
- Pause and look around before you move.
- Pick one clear landmark ahead.
- Stay with your buddies and share what you see.
- As light fades, use night course‑finding and stellar navigation to match the sky with your direction.
These simple steps help you trust yourself without guessing. Once you slow down and pay attention, you’ll feel less lost and more like part of the trail crew.
How to Read a Map and Compass
Once you read a map, start by spotting the symbols that show trails, water, roads, and landmarks.
Then match those symbols to your compass bearing so you can tell which way you’re facing and where to go next.
With a little practice, these two tools work together and make the trail feel a lot less confusing.
Map Symbols
Map symbols are the quiet language of a map, and once you learn them, the whole page starts to make sense. Whenever you practice legend interpretation, you can spot trails, water, camps, and hazards fast. Contour symbols show shape, so hills, valleys, and steep slopes stop feeling like guesswork. That matters because you want to move with confidence, not panic.
- Check the legend initially.
- Match colors to land features.
- Notice contour lines and spacing.
- Identify roads, streams, and shelters.
Afterward you can read the map like a teammate, not a stranger. In case something looks crowded, slow down and compare the symbol with the legend. You belong out there, and this skill helps you feel ready, steady, and less alone on the trail.
Compass Bearing
Now that you can spot the right symbols on a map, you can use a compass bearing to turn those symbols into a real direction on the ground. Hold the compass flat, line up the needle with north, then walk the arrow’s direction with confidence. You’re not guessing alone anymore; you’re joining a simple field skill that keeps hikers calm and connected.
| Step | What you do |
|---|---|
| 1 | Match map north to compass north |
| 2 | Adjust for magnetic declination |
| 3 | Follow your bearing |
| 4 | Use bearing triangulation in case you need help finding your spot |
Provided the trail bends, reset your bearing often. Whenever clouds roll in, trust your tools and your practice. With each check, you’ll feel steadier, like you’ve got a small team in your pocket.
How to Signal for Help
A simple signal can cut through panic and help others find you faster, so it’s worth using every clear method you have. You’re not alone out there, and calm action helps the most.
- Use distress patterns like three whistle blasts or three flashes.
- Hold up signal mirrors toward aircraft, boats, or open ground.
- Make big, bold shapes with rocks, logs, or gear.
- Keep your signals spaced so rescuers spot the pattern.
Next, move where people can see you, such as a ridge, clearing, or shoreline. In the event you have a light, flash it in short bursts.
In case you hear others nearby, answer with clear calls and repeat them. Small efforts add up fast, and your steady signals tell help exactly where to look.
How to Pack a Survival Kit
Your survival kit should feel light, smart, and ready to grab once stress hits, because in a tough moment you won’t want to sort through a messy pile of gear.
Start with the basics: a small light, fire starter, cord, initial aid items, and a knife you trust.
Then use redundancy packing, so you keep backup ways to make fire, find light, and repair gear.
Next, consider seasonal tailoring. In cold weather, add gloves, a hat, and hand warmers. In hot weather, pack sun cover and extra water treatment.
Keep everything in one pouch, label tiny parts, and check it monthly.
If you pack with your group in mind, you stay calm, prepared, and ready to help each other fast.
How to Keep Food Safe Outdoors
Food can go bad fast outdoors, so it helps to plan ahead before hunger turns into a risky mistake. Keep perishable items cold in an insulated cooler, and open it only whenever you need something. Use pack rotation so older food gets eaten initially, and label bags provided you’re traveling with a group. For pest proofing, seal snacks in hard containers or tight bags, because curious animals and bugs love an easy meal.
- Pack foods that spoil slowly, like nuts and jerky.
- Store raw and ready-to-eat items apart.
- Keep hands and tools clean before every meal.
- Check seals after each stop, especially in heat.
Whenever your group shares food the right way, everyone feels safer and more settled. That little bit of care keeps camp meals simple, calm, and welcome.
How to Spot Emergency Hazards
As soon as trouble starts outdoors, quick noticing can make all the difference, so you need to watch for hazards before they grow into real emergencies. Stay with your group and scan the sky, ground, and trees for sudden changes. Should weather warnings pop up, treat them as a heads-up, not background noise. You can check for loose rocks, rising water, broken branches, and thin ice near paths.
| Hazard | What You See | Your Move |
|---|---|---|
| Storm | Dark clouds | Find shelter |
| Animal behavior | Nervous wildlife | Back away |
| Terrain | Cracks or drops | Change route |
When animals act restless, give them space and move calmly. Through noticing these clues in advance, you help everyone stay safer and more confident together outdoors.
How to Stay Warm in the Wild
Once you’ve spotted danger around you, the next job is to keep body heat from slipping away, because cold can wear you down fast in the wild. You’re not alone here, and small moves help a lot. Build insulated layering with dry clothes close to your skin, then add a windproof shell.
- Tuck in your shirt and cuffs
- Cover your head and neck
- Sit on pine boughs or a pack
- Keep moving gently, not sweating
Next, check your hands and feet often, since they cool first. Should your clothes get wet, swap them fast and stay out of the wind. Drink warm fluids provided you have them, because they support body heat retention. Whenever you stay calm and layer smart, you give yourself a real chance to stay steady and safe.
How to Practice Survival Skills
Start small and build up, because survival skills stick best once you rehearse them step by step. You learn faster whenever you treat practice like a campfire circle, where everyone can try, fail, and try again. Begin with risk assessment so you notice wet ground, bad weather, and weak gear before trouble starts. Then run practice scenarios like finding water, tying knots, or building shelter with friends. | Practice | Feeling |
| — | — |
|---|---|
| Calm repetition | You feel ready |
| Shared drills | You feel supported |
| Honest mistakes | You grow stronger |
Next, switch roles so each person leads once. That way, you don’t just copy moves; you own them. Keep your pace steady, laugh at small slips, and review what worked. Whenever you practice together, you build skill and trust at the same time.
Frequently Asked Questions
What Clothing Is Best for Long-Term Wilderness Survival?
You’ll do best in durable, layered insulation with moisture wicking fabrics, plus a weatherproof outer shell. Choose breathable, quick drying pieces that fit together comfortably so you stay warm, dry, and part of the group.
How Do You Treat Insect Bites and Stings Outdoors?
You treat bites fast: clean the wound with water, apply a cool compress, and watch for swelling. Keep allergy preparedness close like a trusty sidekick. In case symptoms worsen seek help and use epinephrine.
What Basic Knots Should Every Survivor Know?
You should know the bowline knot, clove hitch, square knot, and taut line hitch. They will help you secure shelter, gear, and lines and give you confidence because you are part of a prepared crew.
How Can You Find Edible Plants Safely?
You can find edible plants safely by studying edible identification guides, confirming each plant with multiple trusted sources, and practicing seasonal foraging alongside local experts. If in doubt, do not eat it; your group’s safety matters most.
When Should You Stay Put Instead of Moving?
Provided that you’re injured, exhausted, or rescuers are near, you should stay put. About 80% of lost people are found within 24 hours. Make a wait decision, use signal methods, and trust your team instincts.