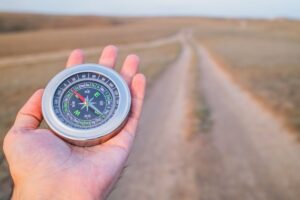

A compass points magnetic north and gives a reliable reference when trails and landmarks fade. Hold it level and steady, align the orienting arrow with the needle, and read the bearing off the baseplate. Apply local magnetic declination to convert compass bearings to map bearings for accurate navigation. Backtrack using pacing and known landmarks when a route feels wrong, and use natural cues to confirm direction. Mastering these simple steps keeps trips safer and reduces stress on unfamiliar terrain.
Why You Need a Compass in the Wild
As you head into the wild, a compass gives you a steady way to stay on track, even as the trail gets confusing or the trees block your view.
You can trust it whenever your phone dies, fog rolls in, or the path bends in ways you didn’t expect.
It helps you protect your group, choose safer routes, and keep your mind calm whenever the land feels unfamiliar.
During wildlife orientation, you can avoid wandering into risky areas and stay aware of where you’re going.
Should you ever need emergency signaling, appreciating your direction helps rescuers find you faster and helps you guide yourself toward help.
That support matters because being lost can feel heavy, but with a compass in hand, you’re not alone out there.
Parts of a Compass You Should Know
Whenever you hold a compass, the needle is the initial part you’ll notice because it points north and helps you stay oriented.
The orienting arrow works with the needle, so you can line up your direction the right way prior to you move.
Then the baseplate markings give you a clear guide for reading your course and keeping your path steady.
Compass Needle
The compass needle is the heart of your compass, and it gives you the direction you need fast. You watch it settle, then trust that small swing to point north.
Whenever you’re hiking with friends, that steady motion can calm you, because it means you’re not lost alone. Keep the compass level, and wait for needle damping to stop the bounce.
Should magnetic interference be nearby, like a knife, phone, or metal buckle, step away and check again. A clean reading helps you stay confident on the trail.
You don’t need fancy gear or big words, just a little patience and a clear view. Once the needle rests, you can move with the group and keep your route honest.
Orienting Arrow
Next, let’s look at the orienting arrow, because this small mark helps the compass make sense.
You line the arrow up with the magnetic needle, and then your map work feels less like guesswork and more like teamwork.
Whenever you follow a sighting technique, the orienting arrow gives you a steady target inside the housing, so you can hold your direction with confidence.
It also helps you notice magnetic variation, which can shift your reading should you ignore it.
Don’t worry provided it feels odd at initially; everyone starts there, and you’re not out there alone.
As you practice, this arrow becomes a quiet guide that keeps you moving in the right line, even whilst the trail gets tricky.
Baseplate Markings
Those small lines and numbers on the baseplate do more than fill space, because they help you turn a simple compass into a practical tool. You can use the straight edge to line up a trail map, and the scaled rulers to measure distance with confidence.
Whenever you need a quick check, the markings let you compare map points without guessing. Should your compass have a sighting mirror, the clear baseplate lines also help you aim while keeping your place on the map.
That matters whenever trees crowd your path and you want to stay calm. With a little practice, you’ll feel like part of the crew that knows where it’s going, even whenever the forest feels tricky.
How to Hold and Read a Compass
Hold your compass flat in both hands, and keep it level so the needle can move freely. Then turn your body, not the compass, until the red needle lines up with the orienting arrow.
Once you do that, you can read your direction with confidence and keep moving the right way.
Compass Grip Basics
With the compass resting flat in your palm, you give yourself the best chance to read it right and stay calm as the trail gets confusing.
Keep your elbow close and let your Thumb placement anchor the base so the compass doesn’t wobble. Your other fingers should support the side without squeezing, because a tight grip can shake your aim.
Next, use Wrist rotation to turn your whole hand smoothly instead of twisting the compass itself. That small move helps you stay steady and feel in control, even whenever the woods look busy.
Should your hands be cold or sweaty, pause and reset your grip. You’re not behind the trail; you’re learning its language. A calm hold makes every step feel less lonely and a lot more certain.
Reading The Needle
The needle is the compass’s quiet voice, and once you learn to read it, the woods start making a lot more sense.
Hold the compass flat and still in front of you. Let the needle settle before you move. Should it jitters, give it a second; that needle wobble usually fades once your hands calm down.
| What You See | What It Means | What You Do |
|---|---|---|
| Steady needle | Good reading | Turn your body to match it |
| Wobbling needle | Compass not settled | Pause and hold still |
| Shifted needle | Magnetic interference nearby | Step away and try again |
You’re not alone here. Every hiker learns this step, and you’ll get better fast. Watch the red end, keep your map close, and trust the calm moment once the needle points true.
Find North First
Where do you start as the woods all look the same? You begin by finding north, because every good route grows from that one steady point. Hold your compass flat in your palm and let the needle settle.
The red end points north, and that gives you a calm reference when trees, rocks, and trails all blur together. Trust that small tool; it’s like a friend who never panics.
Should you’ve ever felt turned around, you’re not alone. Many hikers do. Once you know north, you can choose a direction with confidence and keep your group moving together.
This initial step also sets you up for magnetic variation and even stellar wayfinding later, but for now, stay with the needle. It’ll guide your next choice.
Adjust for Declination
A small twist of the compass can save you a lot of confusion, so now you need to adjust for declination. You and your trail buddy can stay on the same page when you account for magnetic variation, because true north and compass north aren’t always twins.
- Check your map for the local adjustment.
- Add east declination to your bearing.
- Subtract west declination from your bearing.
- Recheck your compass after each turn.
This small habit keeps your direction honest and helps your group move with confidence. Should the number feel odd, don’t worry; plenty of good hikers have squinted at declination and survived to tell the tale.
Just observe the value, make the correction, and trust your setup. That simple step turns guesswork into teamwork and keeps you moving together.
Orient a Map With Your Compass
Once you’ve set your declination, you can line up your map with your compass so your world makes sense on the page and on the trail.
Place the compass edge along a north-south grid line or a map edge, then turn the map until the compass needle rests in the orienting arrow. Keep the baseplate flat and move away from magnetic interference like cars, knives, or rocks with metal veins.
Now use feature matching: find a trail bend, creek, ridge, or campsite on both the map and the land around you. Whenever those shapes point the same way, you’ve got a steady map.
In case the paper starts slipping, smile and reset it. You’re not behind; you’re learning the trail’s language, and that takes a calm hand.
Take a Bearing From the Map
Initially, read the north lines on your map so you know which way the page points. Then line up your compass edge with the map’s direction of travel, and keep both tools steady as supposing they’re having a quiet conversation.
This helps you take a clean bearing without guessing, so you can move with more confidence.
Read Map North
Your map’s north arrow is the quiet clue that keeps everything lined up, and it matters more than it looks. Whenever you read map north, you set your whole route with confidence, not guesswork.
- Find the north arrow on the map.
- Notice how map symbols point to trails, ridges, and water.
- Check magnetic declination so your direction stays true.
- Turn the map until north on the page feels right for you.
Now you can see how the land and paper fit together. That small step helps you feel less alone out there, because your map starts speaking the same language as your compass. Once you learn this skill, you join a group of hikers who trust clear choices and steady direction.
Match Compass Edge
Slide the compass edge along the map route as soon as you want a bearing that feels steady and clear. Keep the straight edge on your line of travel, then turn the housing until the orienting lines sit with map north. That edge alignment helps you take a clean bearing without guesswork.
Next, check the degree mark at the index line, and make sure the arrow points where you need to go. Should your compass have a small rim, use rim calibration to confirm the dial reads smoothly and stays true.
Then lift the compass carefully and hold onto that number. You’re not doing this alone, and it gets easier fast. With practice, you’ll trust the map, trust your tools, and move with calm confidence.
Follow a Compass Bearing on the Trail
To stay on course, set your compass bearing before you start walking, then keep checking it as you move along the trail. You’re not out there alone; every careful step helps your group stay together and calm.
- Hold the compass flat at waist level.
- Turn until the needle lines up with the orienting arrow.
- Pick a distant point ahead and walk to it.
- Repeat after every bend, climb, or short stop.
If your pack or trekking poles cause magnetic interference, step away from them before you read the needle. Then resume with steady, relaxed movement. You don’t need speed; you need trust in the process.
Whenever you keep your bearing, you protect your energy and help everyone feel confident.
Use Landmarks to Check Your Direction
Look for landmarks like a ridge, lake, or lone tree, and use them to confirm you’re still headed the right way.
Then line your compass up with the terrain, so the map and the ground match what you see.
Should the path bends or the land changes, check those landmarks again and make sure your direction still feels steady.
Identify Visible Landmarks
Whenever you’re deep in the wilderness, even a single tree line or rocky ridge can give you a helpful clue about where you are. You can trust what you see and let it support your compass check. Look for:
- distant hilltops that stay fixed as you move
- seasonal landmarks, like snow patches or autumn fire roads
- wide bends in rivers or streams
- unique boulders, clearings, or split peaks
First, notice which features stand out from your spot. Then pick the ones you can see again from nearby places, so your group stays confident together. Should one landmark disappear behind trees, don’t panic; select another that remains easy to spot.
This simple habit helps you match direction with real terrain and keeps you calm while you travel with purpose.
Align Compass With Terrain
Once you’ve picked out a few steady landmarks, use them to line up your compass with the land around you. Hold the compass flat, then turn your body until the needle settles beside north.
Next, compare that heading with nearby terrain features like ridges, bends in a creek, or a lone rock outcrop. When your line of travel fits the scene, you’ll feel more confident and less lost.
If the image feels off, pause and look again. Sometimes magnetic anomalies near metal, cliffs, or buried rock can tug the needle a little. That’s normal, and you’re not doing anything wrong.
Stay calm, trust what you see, and match your compass to the world in front of you. Your map and eyes work best together.
Confirm Direction Changes
After you’ve lined up your compass with the land, keep checking it as you move, especially each time the trail bends or the view changes. You’re not just walking, you’re staying with your group and trusting small signs to keep you on track. Use landmarks to confirm your heading and make calm course corrections before you drift far.
- Pick a tree, ridge, or rock you can spot again.
- Take step checks after each short stretch.
- Compare the landmark with your compass needle.
- Adjust your path gently, then look again.
If the forest feels confusing, breathe and slow down. A tiny turn now can save a long backtrack later, and that’s something every hiker can appreciate.
Find Your Location on a Map
Hold your map flat and match what you see around you to the printed clues, because finding your exact location on a map starts with the land itself. Initially, line up nearby ridges, streams, or trails with their symbols.
Then use the triangulation technique alongside taking bearings to two or three known landmarks and drawing those lines back on the map. Where they meet, you’re close.
Next, check contour interpretation so hills, valleys, and saddles make sense with the ground under your boots.
Should the spot still feel fuzzy, compare small details like bends in a river or a trail junction. Stay calm, trust your tools, and let the map and terrain work together. You’re not alone out there.
How to Recover If You Lose Your Bearing
Whenever your compass reading starts to feel wrong, don’t panic, because you can get back on track with a few calm steps. You’re not alone out there, and this happens to even careful hikers.
Initially, stop and breathe. Then use these steps:
- Pause and circle back to the last place you felt sure.
- Check that the compass sits flat and away from metal.
- Look around for a clear landmark you trust.
- Make a mental recalibration, then choose one steady direction.
If you still feel unsure, stay put for a minute and listen for trail signs or wind shifts. Small corrections work better than rushed guesses.
As you slow down, you protect your group’s rhythm and keep your own confidence steady. Soon, you’ll feel your sense of direction return.
Practice Compass Skills Before Your Trip
Before you head into the woods, spend time practicing with your compass in a place where you can relax and learn without pressure. Start initiating walking short routes and matching your needle to a map so your hands get used to the steps.
Then attempt indoor simulations at home, like finding north in different rooms, so you build confidence prior to when you’re out there. You can also add nighttime practice with a flashlight, which helps you trust your compass as the light fades.
As you repeat these drills, you’ll feel more steady and less alone, like you’re joining a small crew of smart adventurers who know the land starts with practice. Give yourself patience. Every try makes the next trip feel friendlier, safer, and more your own.
Common Compass Mistakes to Avoid
Even a good compass can lead you astray provided you make a few small mistakes, so it helps to know the trouble spots beforehand. As you head out, stay calm and trust your skills, not panic. Avoid these common errors:
- Holding the compass near a knife, phone, or metal buckle.
- Ignoring magnetic interference from rocks, vehicles, or camp gear.
- Reading the dial before it settles.
- Letting overreliance compasses replace your own awareness of landmarks and trail shape.
If you check your bearing, keep the compass flat, and slow down before each turn, you’ll fit right in with hikers who move with confidence. Small habits make a big difference, and they help you feel steady even whenever the woods get quiet and confusing.
Combine Compass, Map, and GPS
A compass works best while you pair it with a map and GPS, because each tool covers a different part of the trail. You read the map to see ridges, streams, and campsites, then trust the compass to hold your direction when the path fades.
Next, you check GPS for your exact spot and nearby waypoints. Should the satellite signal drops, you still have your map and compass to keep moving with confidence.
Once you practice waypoint syncing before you start, you save time and avoid stress later. You’re not out there alone, either. This simple trio helps you stay calm, make smart choices, and feel part of a capable crew, even as the woods get quiet and the route gets tricky.
Frequently Asked Questions
How Do I Choose the Right Compass for Hiking?
Choose a compass with a clear baseplate, adjustable magnetic declination, and good needle damping. You will feel confident and included on the trail whenever it reads smoothly, fits your maps, and stays reliable.
Can a Compass Work Near Metal Objects?
Yes, but metal objects can cause magnetic interference, so your reading might drift. You will stay on course better by moving away from them or using compass shielding if possible; your trail crew can help.
How Often Should I Calibrate My Compass?
You should calibrate your compass before each trip and anytime magnetic declination changes or you suspect field maintenance issues. That keeps you confident, connected, and ready to steer safely with your crew.
Does Weather Affect Compass Accuracy?
Yes — weather can affect your compass, especially during magnetic storms and temperature effects. Consider your pointer like a knight’s banner in wind: you’ll still belong on course provided you check bearings and stay steady.
What Compass Features Are Best for Night Navigation?
For night wayfinding, choose a compass with luminous markings and a night sighting aid so you can read it quickly and feel confident with your crew. A clear baseplate and rotating bezel help as well.