
A wilderness emergency can escalate quickly and demands calm, clear action. Spot immediate hazards like falling rocks, rising water, or fire and move everyone to safety. Check for severe bleeding, breathing problems, and shock to set priorities for care. Protect injured people from cold, heat, and darkness while planning next steps. Decide whether staying put and signaling for help or beginning a careful self-rescue offers the best chance of survival.
What Is a Wilderness Emergency?
A wilderness emergency is any urgent problem that puts your safety at risk while help is far away.
In the wilderness definition, it means your body, gear, or route is in real trouble, and you might need fast action to stay safe.
Within emergency taxonomy, it can include injuries, sudden illness, harsh weather, getting lost, or a broken tool that leaves you exposed.
You’re not alone when this happens, even though it feels that way. Your group, provided you have one, becomes your support team, and every person can help in a calm, practical way.
Understanding this term matters because it helps you spot real danger fast and treat it with respect, not panic. Consider it your signal to slow down, stay connected, and protect your next step.
Stay Calm and Assess the Scene
Whenever trouble hits, your initial job is to pause, breathe, and look around before you move. You’re part of a team now, even though you’re alone, and steady reflection helps you act wisely. Use breathing techniques to slow your pulse and clear your head.
Then do quick mental triage: notice who’s with you, how everyone seems, and what’s changing in the scene. Listen for sounds, scan for weather shifts, and check how much daylight you’ve got left.
Keep your eyes moving, but don’t rush. A calm view helps you spot clues others miss. Whenever you stay grounded, you make better choices and protect your group’s confidence. That shared calm can feel small, yet it’s often the initial real help you can give.
Stop Immediate Danger First
Now that you’ve taken a breath and sized up the scene, your next move is to stop anything that could hurt someone right away. You belong in this moment, and you can help by acting fast and steady.
To begin, remove hazards like loose rocks, sharp gear, fire, or moving vehicles provided you can do it safely. Then prioritize threats, starting with the danger that could cause the most harm in the next minute.
Should a branch be about to fall, move people away. In the event water is rising, guide everyone to higher ground. In case a tool is still running, shut it off.
Keep your voice calm and clear so others know where to go. Small, quick choices now can protect the whole group and keep panic from growing.
Check for Injuries and Shock
Once the scene feels safer, check each person right away for injuries and signs of shock, because concealed problems can turn serious fast. Move calmly and speak your name so everyone knows you’re there. Look over the head, chest, belly, arms, and legs, and notice blood, swelling, or odd movement. Then do a quick breathing assessment by watching the chest and listening for air. In case someone seems pale, cold, shaky, or confused, observe shock indicators and keep them still.
| Check | What you see | What you do |
|---|---|---|
| Body | Bleeding | Watch closely |
| Mind | Confusion | Reassure them |
| Skin | Pale, clammy | Protect warmth |
Stay close, because your steady presence helps the whole group feel safer once fear starts to rise.
Give First Aid for Common Injuries
Whenever you face a wound in the wild, act fast to control severe bleeding with steady pressure and keep the person calm.
Should you suspect a sprain or fracture, support the injury, limit movement, and protect it from more harm.
For burns and smaller cuts, clean the area gently, cover it with a clean dressing, and watch closely for swelling, pain, or signs of infection.
Control Severe Bleeding
Severe bleeding can feel scary fast, but you can take control with calm, firm action. To begin, press a clean cloth, shirt, or bandage directly on the wound and keep steady pressure. Should blood soaks through, add more layers; don’t lift the first one.
Next, when the injury is on an arm or leg and bleeding won’t stop, use pressure points above the wound while you keep pressing. In case you still can’t slow it, move to tourniquet application. Place it two to three inches above the wound, never over a joint, and tighten until bleeding stops. Then remember the time.
Stay with your buddy, keep them warm, and watch for shock. Your quick care can save a life.
Treat Sprains And Fractures
A twisted ankle or a broken bone can shake you up fast, but a calm initial response makes a big difference.
You should stop moving, then check for pain, swelling, and odd shape. Keep the injured part still with a gentle splint or by supporting it against your body. Should you be able, loosen tight shoes or make footwear adjustments so pressure drops.
Use cold cloths or wrapped ice for inflammation management, but never place ice right on skin. Raise the limb unless that doesn’t cause more pain.
Then stay close to your group, because steady support helps you feel safer. In case the injury looks severe, you can’t bear weight, or the bone seems out of place, get help right away and avoid forcing movement.
Handle Burns And Wounds
Start near calming the scene and checking the injury without rushing.
Should the skin be red, blistered, or broken, move the person away from heat or dirt. Cool burns with clean water, not ice, then cover them with a loose, clean cloth.
For wounds, rinse with sterile irrigation should you have it, or use the cleanest water available to flush out grit. Press firmly with cloth to slow bleeding.
Keep the person warm, because shock can sneak up fast. In case pain feels strong, use simple pain control like rest, gentle support, and approved medicine whenever available.
Watch for deep burns, heavy bleeding, or signs of infection. Stay calm with your team, because steady hands help everyone feel safer and get back together sooner.
Find Shelter From Weather and Exposure
Whenever weather turns rough, you need to find cover fast, so look for natural windbreaks like rock walls, thick trees, or a dip in the land that can block the worst of the wind.
In case you can’t find one, use emergency shelter materials such as a tarp, poncho, rope, branches, or even extra clothing to build a small barrier around you.
Then focus on heat retention methods like getting off cold ground, wrapping up dry layers, and sharing body warmth so you can hold onto every bit of heat you’ve got.
Natural Windbreaks
Provided the wind is cutting through you, natural windbreaks can give you fast relief and buy you time. Look for a rock wall, thick evergreen stand, ridge, or fallen log that blocks the blast.
To start, check the wind direction so you can set your back to the gusts and stay out of the chill. Then move to the side that gives the most cover and the least wet ground.
As you settle in, crouch low and keep your body compact to hold warmth. Should snow, rain, or loose debris be falling, choose a spot where branches, stones, or slopes won’t add new danger.
A good natural shelter won’t solve everything, but it can steady you, calm your nerves, and help you ponder clearly while you wait for better conditions.
Emergency Shelter Materials
Provided that the wind has already pushed you to the edge, the next step is finding materials that can keep you alive long enough to get warm, dry, and steady.
Look for what the land gives you, then add light gear you already carry.
An emergency bivy blocks rain and traps your body heat close. A reflective tarp gives you a fast roof and a bright signal in dim light.
Should you be with your crew, split the work so everyone stays focused.
- Dense branches for a quick lean-to
- Pine boughs for a soft, raised floor
- Cordage to tie corners and ridges
- Rocks to anchor shelter edges
- Leaves or grass to fill gaps
Choose dry ground, stay low to the wind, and keep your hands moving.
Heat Retention Methods
The fastest way to hold onto body heat is to cut down every path it can escape. You can do that via layering insulated clothing and zipping every opening tight. Keep your head, neck, and hands covered, because these spots leak heat fast.
Next, get off wet ground and block wind with a pack, tarp, or snow wall. Dry layers matter, so change out of damp clothes as soon as you’re able.
Then protect your body heat with reflective blankets. Wrap one around you, shiny side in, and leave a small air space when possible. Should you have chemical warmers, place them in your core areas, like your chest or groin, not on bare skin. Stay close to your group, share warmth, and keep moving only enough to stay safe.
Signal for Help in the Wilderness
As soon as you realize you’re lost or hurt in the wild, you need to act fast and stay calm, because a clear signal can bring help sooner and keep panic from taking over. You’re not alone out there, so make your presence obvious and steady.
- Blow three sharp whistle codes, then pause and repeat.
- Flash mirror signaling toward any aircraft, ridge, or open trail.
- Stack bright gear, rocks, or branches into a large SOS shape.
- Shout only when you suppose someone is near enough to hear you.
- Move to open ground where your signal stands out.
After that, keep signaling in short bursts so you save energy. Should you hear a reply, answer the same way. Small actions like these help rescuers find you faster, and they remind you that hope still has a path.
Use Your Map, Compass, and GPS
As fear starts to rise, your map, compass, and GPS can give you back a sense of control, because they help you turn confusion into a simple plan. Initially, match the map to the land around you, then hold the compass flat and adjust for magnetic declination so your reading stays true. Should you be with others, share the devices so everyone feels included and useful. Whenever your GPS has a weak signal, use waypoint averaging to settle on a better position.
| Tool | What You See | What You Do |
|---|---|---|
| Map | ridges, streams | line up landmarks |
| Compass | needle steady | follow your bearing |
| GPS | blinking dots | confirm your spot |
Together, these tools help you stay calm, connected, and ready for the next smart move.
Decide Whether to Stay or Move
Pause for a moment and check your situation before you start moving. Look around, breathe, and trust your team.
Should you be safe where you are, staying might keep everyone calmer and easier to spot. In case danger is close, move with care.
Use your map, compass, and GPS to compare route options, then choose the path that gives you the best chance to reach help.
Talk with your group and aim for group consensus, because no one should feel pushed aside.
- Notice weather, light, and nearby hazards
- Pick a clear direction with your crew
- Keep voices calm so everyone feels included
- Choose simple terrain instead of risky shortcuts
- Check that your plan fits your energy and skill
Save Water, Food, and Energy
As soon as your body starts using more than you can replace, every sip, bite, and step matters, so you’ll want to slow down and protect your supplies right away. You’re not alone here; smart choices keep your group steady and hopeful.
| Action | Why it helps | What to do |
|---|---|---|
| Conserve fluids | Keeps you going longer | Sip only as necessary |
| Ration calories | Saves food for later | Eat small, planned portions |
| Rest often | Cuts extra demand | Sit before you feel drained |
| Share gear | Protects energy | Pass work around the group |
| Track supplies | Prevents surprises | Check bottles and snacks |
Next, move with purpose. Avoid extra wandering, make one person handle supplies, and keep tasks simple. Whenever you conserve fluids and ration calories, you protect your strength and help everyone stay calm together.
Treat Hypothermia, Heat, and Dehydration
Assuming your body starts losing heat, building up too much warmth, or running low on water, you need to act fast because small problems can turn serious in a hurry. For hypothermia, move to shelter, add dry layers, and warm your core with body heat. For overheating, loosen clothes, rest in shade, and use cooling techniques like damp cloths and airflow. Once dehydration starts, sip water often instead of gulping it, and follow smart hydration strategies to stay steady.
- Watch for shivering, confusion, or clumsy hands
- Look for flushed skin, headache, or nausea
- Share your extra water with the group
- Eat salty snacks if you can
- Check each other’s skin and energy
You’re stronger when you notice these signs promptly and help your crew before things slide.
Handle Nightfall and Low Visibility
As daylight fades fast, you need to find safe shelter prior to darkness making every step harder.
Use a flashlight, headlamp, or even a phone light to keep your hands free and your path clear.
Then mark your position with bright fabric, reflective gear, or a fire so rescuers can spot you more easily.
Find Safe Shelter
Night can turn a hard situation into a scary one fast, but you can still make smart choices that keep you safer and calmer.
To begin, stop and look for natural shelters like a rock overhang, thick spruce trees, or a dry hollow that blocks wind.
In case you have to build your own cover, use branches, leaves, and your pack to make a low roof.
Then clear wet ground, stay off flood paths, and keep your group close so nobody feels alone.
- Tuck into dry brush for windbreak.
- Lay pine boughs under your body.
- Tie improvised hammocks between sturdy trees.
- Use a slope that sheds water.
- Share space, warmth, and steady words.
Use Light Sources
Bring out any light you have as soon as the dark starts closing in, because even a weak glow can make a rough situation feel more manageable.
Use your headlamp initially if you have one, since it keeps both hands free and helps you move with confidence. Check headlamp maintenance now: tighten the strap, clean the lens, and save battery through using the lowest safe setting.
Should your light fail, use candle alternatives like a small LED lantern or glow stick instead, because open flame can be risky in tight shelter. Keep the beam aimed low so you can see your footing without wasting power.
In case you’re with others, share the light and stay close so nobody feels alone in the dark.
Mark Your Position
As the light fades, shift your focus from seeing the trail to making yourself easy to find. You’re not alone out there, and smart marking helps rescuers reach you faster. Pick a visible spot and stay there when possible. Use bright clothing, a pack cover, or a tarp to signal your place. Lay out gps markers on your map app, then keep your phone charged. Should you possess a whistle, sound three sharp blasts every few minutes. For rescue signal device placement, set it high and clear of branches so the signal can travel.
- Open space beats heavy cover.
- Reflective gear catches beams.
- Flashlights help from far away.
- Save energy while you wait.
- Stay calm and keep watching.
Prepare to Spend the Night Outdoors
Should you realize you may have to stay out overnight, your initial job is to get calm and make a simple plan. Pick a dry, sheltered spot, and clear sharp rocks, sticks, and damp leaves.
Next, build improvised bedding with pine boughs, grass, or extra clothing so you stay off the cold ground. Should you have a tarp, pack, or jacket, use it to block wind and hold in warmth.
Then focus on cold weather sleeping by keeping your layers dry, loosening tight clothing, and covering your head. Sip water provided you have it, because staying hydrated helps you keep steady.
Stay close to your group, where feasible, and keep your gear within reach. Little comforts matter here, even a stubborn boot can become a pillow.
Know When and How to Self-Rescue
Initially, check your injury honestly so you know what you can still do without making things worse.
Then pick the safest way out, even though it feels slow, because a careful escape beats a risky shortcut.
In case you stay calm and move with purpose, you give yourself a much better shot at getting back to help.
Assess Injury Severity
When an injury happens far from help, your next move can shape everything that follows. Initially, slow your breathing and check essential signs.
Look at skin color, pulse, and alertness, then use a quick sensory assessment. Can you feel touch, pain, heat, and movement? This helps you spot danger fast and stay calm with your group.
- Watch for heavy bleeding or deep cuts.
- Notice swelling, deformity, or bones out of place.
- Ask whether pain is sharp, dull, or getting worse.
- Check whether the person can stand, walk, or grip.
- Look for confusion, faintness, or trouble breathing.
Should symptoms remain mild, you could be able to self-rescue with care and pace. Should they grow fast, treat the injury as urgent.
Choose Safe Escape
Choosing a safe escape route can make the difference between a hard day and a dangerous one, so you need to contemplate clearly before you move.
Initially, stop and scan for rockfalls, swift water, fire, or thick brush.
Then use route selection to pick the path that keeps you steady, visible, and close to help.
In case your injury is mild and you can walk, move slowly and trial every step.
Should you feel weak, dizzy, or lost, stay put and signal for rescue instead of gambling on a bad climb.
Good hazard avoidance means you choose slopes, open ground, and familiar landmarks, not shortcuts that look easy and turn mean.
Breathe, trust your group, and make each move count.
Frequently Asked Questions
What Should I Pack in a Wilderness Emergency Kit?
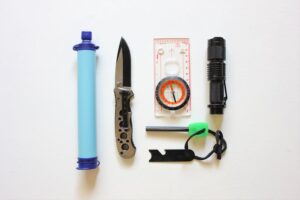
Pack water purification, a primary aid kit, extra food, flashlight, matches, knife, map, whistle, shelter, and multi tool essentials. You’ll stay prepared, confident, and ready to protect your group whenever surprises hit.
How Can I Prevent Getting Lost Before a Trip?
You can prevent getting lost through contrasting bright maps with dark trails: plan your route, share it, and run a gear checklist. You’ll belong with prepared hikers who trust maps, compasses, and communication, not guesswork.
What Clothing Is Best for Unexpected Wilderness Emergencies?
You’ll want a layering strategy with moisture wicking fabrics, plus an insulating mid layer and waterproof shell. Choose warm, durable clothes that fit your group’s shared outdoor style, so you stay prepared, comfortable, and connected.
How Do I Communicate My Itinerary to Rescuers?
You light the trail for rescuers by sharing your leave itinerary with trusted people, including routes, camps, and return times. Carry an emergency beacon as well so your signal can cut through the dark should you be overdue.
What Should I Do if I Encounter Wildlife During an Emergency?
You should stay calm, avoid eye contact, and back away slowly while speaking softly. Keep your group together, make yourself look larger if needed, and give the animal plenty of space to leave.