
Wet camping gear dries fastest with quick airing, targeted wringing, warm gentle heat, and good airflow. Start by shaking out water, unzipping everything, and separating layers so fabric breathes. Towels and absorbent cloths pull moisture from sleeping bags and jackets. Use low heat or sun to finish drying delicate items and boots, avoiding direct high heat that harms insulation and waterproofing. Prioritize tents, sleeping bags, and footwear to prevent mildew and fabric damage.
Start Drying Wet Camping Gear Fast
Kick out the extra water as soon as you can, because wet camping gear gets musty fast provided you leave it sitting. You’ll feel better whenever you act right away, and your crew will too.
Shake each item hard, then use rapid wringing on clothes, socks, and towels to push out concealed moisture.
Next, open pockets, straps, and sleeves so air can move through them.
Should you have a quick tarp strike, spread the tarp, lay damp pieces on top, and let the sun do some honest work.
Keep heavier items apart from lighter ones, since crowded gear stays wet longer.
As you sort things, you’ll make the whole campsite feel calmer and more under control, even though the day still smells a little like rain.
Dry Tents and Tarps
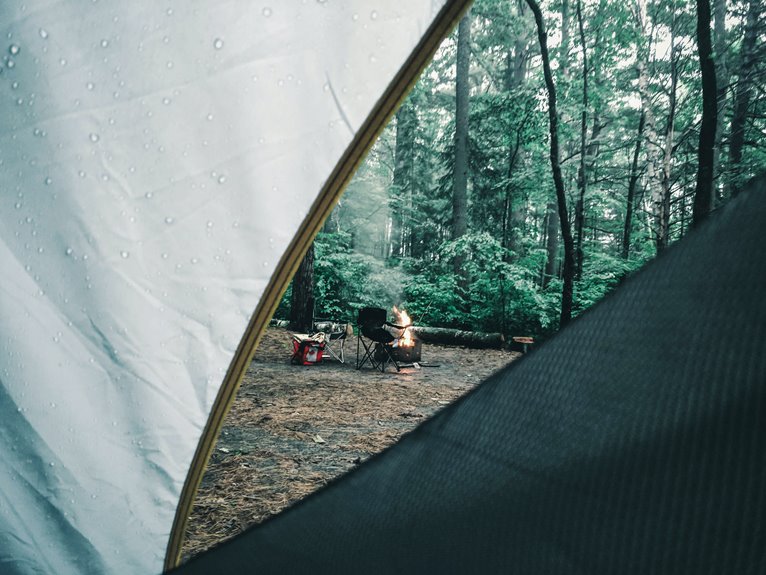
Once your tent or tarp is soaked, open every vent and door you can so air can move through and pull out the dampness.
Should the sun be strong, hang it in light shade initially, since direct heat can stress fabric while steady airflow does the real work.
Keep the material spread out and smooth, and you’ll help it dry faster without trapping wet spots.
Ventilation Basics
Good airflow is often the fastest way to save a soggy tent or tarp, because trapped moisture can turn a damp night into a heavy, musty mess.
You can open doors, vents, and rainfly gaps to create airflow pathways that move wet air out. Then spread the fabric wide so moisture gradients can fade faster instead of lingering in folds and corners.
Should you’re camping with friends, ask someone to hold one edge while you shake out droplets, since teamwork makes the job feel lighter.
Next, keep lines loose enough for air to pass through, but tight enough to stop puddles from collecting. Also, turn the gear now and then so both sides breathe evenly.
Small steps like these help your camp feel cleaner, fresher, and ready for the next stretch.
Shade Drying Tips
Shade can be your tent’s quiet helper, especially after a wet night. Move your tent or tarp under a cool canopy of trees, but leave space for air to pass through. That mix gives you slower drying than full sun, yet it helps protect fabric with UV protection when you must stay out longer.
Next, shake off drops and spread the material wide so folds do’t trap moisture. Suppose you can, lift one edge on a branch or line so breezes reach both sides.
Then check the ground below; damp soil can send wetness back up. You’re not hiding gear from the world, just giving it a kinder spot to recover. With a little patience, your campsite crew will thank you, and so will your dry, ready-to-pack shelter.
Dry Sleeping Bags Safely
Start from getting your sleeping bag out of its stuff sack and opening it fully so air can move through every part of the fill. Lay it flat in gentle shade, and keep the fabric spread wide so the insulated loft can recover. You’re helping your bag stay cozy for the next trip, and that feels good.
- Turn it every so often so damp spots don’t hide.
- Pat wet clusters with a clean towel instead of rubbing hard.
- Check zipper care through keeping the slider closed enough to protect teeth.
If you can, hang the bag over a wide line or clean branch, but don’t let one point strain the shell. Move it indoors once it feels almost dry, then finish in a breezy room. That extra patience keeps your camp crew ready for warmer, drier nights.
Dry Boots, Socks, and Clothes
Pull each boot, sock, and clothing layer out of the pile and give every piece room to breathe. You’re not cleaning a campsite trophy case; you’re helping your gear recover. For boots, loosen the laces and open the tongue. For socks and shirts, spread them flat or hang them apart so wicked wicking can do its job.
| Item | Best move |
|---|---|
| Boots | Open wide |
| Socks | Lay flat |
| Clothes | Hang apart |
Keep damp items separate from dry ones, and use fabric rotation so nothing stays trapped in the same soggy spot. In case one layer still feels clammy, swap its place with a drier piece. That small habit helps your whole crew stay more comfortable, warmer, and ready for the next trail.
Use Heat Without Damaging Gear
When your gear is damp but not dripping, a little heat can help, but too much can ruin the job fast. You want steady warmth, not a blast that warps fabric or melts coatings. Set items near a safe heater, then give them space to breathe.
Should you use heat tents, follow the maker’s limits so your crew’s gear stays in good shape. Fabric safe dryers work well for socks, liners, and light layers because they move warm air gently.
- Keep zippers open.
- Turn items halfway through.
- Stop as soon as they feel dry.
That way, you protect your kit and stay ready for the next trail, rain or shine.
Stop Mold and Mildew
Even after your gear feels dry, concealed damp spots can still turn into mold and mildew fast, so don’t rush the next step. Open zippers, shake out pockets, and let air circulation reach every seam, strap, and corner.
Should you camp with a crew, spread items apart so each piece gets space to breathe. You can also wipe obscured spots with a clean, dry cloth to catch sneaky moisture before it settles in.
Keep humidity control in mind through moving gear away from steamy bathrooms, wet ground, or packed car trunks. A small fan helps, too, because moving air keeps damp smells from taking hold.
Once you check your gear carefully now, you protect the whole kit and keep your next trip feeling fresh, comfortable, and ready.
Store Gear So It Stays Dry
Now that your gear is dry, tuck it away with care so that hard-earned dryness doesn’t slip away overnight. You want every piece to feel ready for the next trip, just like you do.
- Slide tents and quilts into waterproof bins.
- Use pack covers on bags that might sit near damp walls.
- Leave zippers and straps loose so air can move.
Then store everything in a cool, dry spot where sunlight and leaks can’t reach. Should you stack items, keep heavier gear on the bottom and soft gear on top.
That way, your setup stays organized and your camp crew feels prepared, not stressed. You’re protecting more than fabric here. You’re protecting easy mornings, warm nights, and the simple joy of opening clean, dry gear when outing calls again.
Frequently Asked Questions
How Do I Dry Gear During a Rainy Camping Trip?
Start by hanging gear under your tent tarp, then quickly wring clothes and wipe surfaces. You’ll keep things drier than you expect, and your camp crew stays comfortable together through the rain.
Can I Dry Camping Gear in a Car Overnight?
Yes, you can dry camping gear in your car overnight provided you crack windows for window venting, run the car heater briefly, and keep items spread out so you stay safe and cozy together.
What Should I Do if Gear Smells After Drying?
If your gear smells after drying, rewash or wipe it with an odor removal cleaner, then air it out and use a fabric refresh spray. You will bring back that just right camp ready feeling.
How Do I Dry Gear Without Sunlight?
You can air dry techniques without sunlight by hanging gear in a breezy shaded spot and spacing pieces apart like dancers. Turn items often, open pockets, and use fans. Synthetic insulation dries faster so keep it fluffed.
Which Gear Dries Fastest After Unexpected Rain?
Synthetic fabrics dry fastest after unexpected rain, especially lightweight shirts and shells. You should also choose gear with synthetic insulation, since it sheds moisture better and helps you stay comfortable, covered, and ready with your crew.