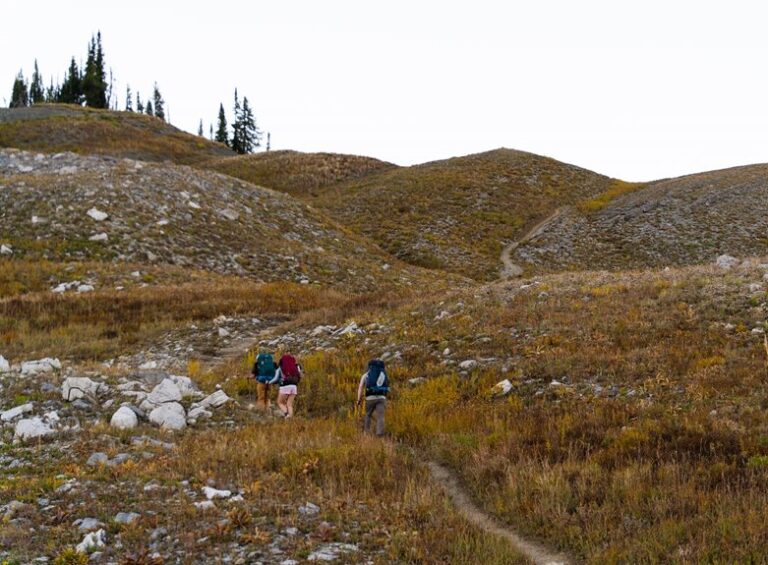


Plan a multi-day backpacking trip that matches your fitness, route, and expected weather. Train with a loaded pack and hill repeats so climbs feel manageable. Study maps, trail reports, permits, and exit routes before leaving. Pack gear and food based on distance, terrain, and weather forecasts. Stay flexible on the trail and make conservative decisions about pace and campsites.
What You Need to Know Before Backpacking
Before you head out on a multi-day backpacking trip, it helps to slow down and get clear on what the trail will really ask of you.
You’ll carry your home, your food, and your patience, so Mental Prep matters as much as your pack. Envision long climbs, sore feet, and small comforts that keep you steady. Then, consider water, weather, and how you’ll follow Leave No trace without leaving the land tired behind you.
You don’t need to know everything, but you do need honest expectations. Talk with others who’ve gone before, and let their stories guide you. Once you prepare this way, you step in with more calm, more confidence, and a better sense that you belong out there too.
Choose the Right Trip for Your Skill Level
Picking the right trip can make the difference between a happy tired and a miserable tired. You want a route that fits your current hiking fitness, not the hero version of you from next month. Start with skill progression: choose trips that stretch you a little, then build up. Should you’re newer, look for short mileage, clear trails, and easy water access. As you grow, add climbs, rougher paths, and longer days. Terrain matching matters too, because rocky slopes, mud, snow, or stream crossings can change everything.
- Pick trail difficulty that matches your pace
- Match elevation gain to your comfort
- Choose weather and terrain you’ve handled before
- Ask experienced hikers for honest advice
When you select well, you join the trail feeling ready, calm, and welcomed.
Build a Realistic Backpacking Itinerary
As you build your backpacking itinerary, start with daily mileage goals that match your fitness and the trail’s terrain. Give yourself enough time to hike without rushing, because a steady pace helps you enjoy the trip and stay safe.
Afterwards plan rest stops where you can eat, drink, and catch your breath, so each day feels manageable instead of overwhelming.
Daily Mileage Goals
Your daily mileage can make or break the whole trip, so it helps to map it out with care. You don’t need to chase big numbers to feel ready. Start with a pace strategy that matches your fitness, your pack weight, and your group’s comfort. Then adjust for hills, rough trails, and heat with smart terrain adjustments. That way, you stay strong instead of slogging past noon.
- Pick a daily goal you can repeat.
- Match miles to the hardest section.
- Leave space for steady, relaxed progress.
When you and your crew know the plan, everyone settles in faster. You’ll move with more confidence, share the load better, and enjoy the trail without feeling rushed.
Rest Stop Planning
As you map out the days, build in rest stops that feel honest, not hopeful. You’re not trying to prove anything; you’re trying to finish strong with your group.
After a hard climb, plan a short pit stop for water, snacks, and a quick foot check. Then set a rest cadence that matches your pace, the heat, and the trail’s surprises. Should one stretch look rough, give yourself a cushion instead of packing the schedule tight. You’ll hike better once you know a break is coming.
Also, talk with your crew about who needs extra time for photos, tape, or a sore knee. That small kindness keeps everyone steady and connected. Whenever your itinerary breathes, you can breathe too, and the whole trip feels more doable.
Check Weather, Trail Conditions, and Permits
Before you lace up your boots, take a close look at the weather, trail conditions, and permit rules, because these three checks can shape your whole trip. You’ll feel more confident whenever you know what’s coming, and your group will move with the same plan. Use microclimate forecasting to catch changes that a broad forecast can miss, especially in valleys or high passes.
Then check recent trail reports for mud, snow, closures, or water crossings that might slow your pace.
- Confirm permit timing promptly so you don’t lose your spot.
- Read ranger updates for fire rules and campsite limits.
- Match your route to the safest weather window.
Whenever you handle these details initially, you make room for a smoother, calmer excursion with your crew.
Choose the Right Backpacking Gear
Start with a pack that fits your trip, not just your wish list, because the right gear can make a long trail feel manageable instead of miserable. You’ll feel more at home whenever every item earns its place and supports your group’s pace.
| Gear | What to notice | Why it helps |
|---|---|---|
| Pack | Fit, frame types | Carries weight well |
| Shelter | Size, season rating | Keeps you dry |
| Cook set | Weight, durability | Makes meals simple |
Choose lightweight materials for your big items, since they cut strain without cutting comfort. Then match frame types to your back and load, so the pack rides steady, not wobbly. Add only the layers, sleep gear, and tools you truly need. Whenever your kit works together, you can relax more and enjoy the trail crew vibe.
Break In Your Boots and Pack
Start by breaking in your boots on short walks, so your feet can adjust before the trail asks for more.
Then pack your backpack with the weight you plan to carry and trial how it feels on your back.
Next, tweak the straps and shift the load until the pack sits steady and comfortable, because a small fix now can save you from a long, sore mile later.
Break In Boots Gradually
Breaking in your boots and pack takes time, but that patience pays off fast on the trail.
Start with short walks around your block, then add hills and loaded carries so your body adapts with less strain.
Should you feel tightness, ease up and let your feet reset.
You’re building a crew of habits that work together.
- Wear your boots for errands or dog walks.
- Do ankle strengthening exercises to steady your steps.
- Keep up leather sole maintenance so the leather softens the right way.
- Load your pack with a few pounds at the outset, then add more each week.
- Check hot spots promptly and tape them before they turn into blisters.
Small, steady practice helps you and your gear feel like old friends on day one.
Test Pack Fit
Now that your boots are easing up, give your pack the same attention so your whole setup feels balanced on the trail. Load it with the gear you plan to carry, then wear it around the house, on stairs, and on short walks.
You want shoulder comfort, hip stability, and a steady feel when you move. Check for hot spots, rubbing, or any awkward pull that makes you tense up. Should the pack shift side to side, your body will notice fast, and nobody wants that surprise halfway up a hill.
Try sitting, bending, and climbing a few steps to see how it behaves. With each trial, you learn what feels right and what needs a tweak, so you can join the trail with more confidence and less worry.
Adjust Straps And Load
Ease into the fit by fine-tuning your straps and evaluating your load, because a pack that feels good in the driveway can feel very different after an hour on the trail. Start with the hip belt, and let it rest on your hips, not your waist. Then snug the shoulder straps until the pack stays close without pinching. Use the load lifters to pull the weight slightly forward, so you stay balanced on climbs and descents.
- Walk around your home with the full pack.
- Add or remove gear until the load feels steady.
- Break in your boots with short walks to spot hot spots prematurely.
When your gear moves with you, you’ll feel calmer, stronger, and ready to join the trail crew with confidence.
Pack Your Backpacking Trip Kit
Before you zip up your pack, gather the gear that keeps you safe, fed, dry, and comfortable on the trail.
Start with your shelter, sleep system, rain layer, headlamp, initial aid items, wayfinding tools, and repair tape.
Then check gear maintenance so zippers, poles, and buckles work before you leave.
Use a smart packing order: place heavy items close to your back and centered, then fill gaps with soft layers.
Keep the things you might need fast, like a jacket and lamp, near the top or in outer pockets.
Because you’re part of the same trail crew, packing well helps everyone move with less stress.
Should something feels off, swap it now, not later.
A calm pack today means a smoother opening mile tomorrow.
Plan Your Food and Water Needs
Map out your food and water plan with care, because what you eat and drink on trail shapes how steady, strong, and comfortable you feel each day. You and your group can build a simple menu around calorie budgeting, so every snack earns its place. Choose foods you actually like, since familiar flavors lift morale whenever the miles feel long.
- Pack oats, nuts, tortillas, and dried fruit for easy fuel.
- Carry more water than you suppose you’ll need, then refill once safe.
- Use water purification tablets or a filter before you drink.
Next, split meals per day so nobody gets stuck with only crumbs on day three. Keep electrolytes handy too. As you plan together, the trail feels friendlier and your camp routine feels easier.
Learn Navigation for the Trail
Once your food and water plan is set, turn your attention to the trail itself, because good route-finding keeps the whole trip calm and on track.
You’ll feel more at home out there whenever you study the map before you leave. Learn the map symbols, then match them to ridges, streams, camps, and junctions. Trace your route with your finger and say each turn out loud so route memory starts to stick.
On the trail, check your position often and compare what you see with the map. A quick glance at a landmark can keep you from wandering into the wrong valley.
Should you hike with friends, talk through the plan together so everyone shares the same path and confidence.
Prepare for Safety and Emergencies
Before you head out, make a simple communication plan so someone knows where you’re going and at what time you expect to check in.
Pack initial aid essentials like bandages, pain relievers, and any personal medicine so you’re ready for small injuries.
You should also watch the weather closely and know your evacuation route, because a rapid, calm response can turn a scary moment into a manageable one.
Emergency Communication Plan
Once you head into the backcountry for several days, a solid emergency communication plan can give you real peace of mind.
Before you leave, tell a trusted person your route, camp spots, and return time. Then agree on whenever they should call for help should you miss a check in.
Carry satellite messaging or another device that works without cell service, and trial it before the trip.
You should also know how to use emergency signaling tools, like a whistle, mirror, or bright gear, in case you need to get noticed fast.
- Share your daily plan with your group.
- Save emergency contacts on every device.
- Pick simple check in times you can keep.
Whenever everyone knows the plan, you can hike with more confidence and feel less alone.
First Aid Essentials
A good emergency communication plan helps, but you still need to be ready for the small injuries that can turn into big problems miles from help. Pack a compact initial aid kit with adhesive bandages, gauze, tape, blister care, pain relief, and tweezers. Add any personal medicines, and keep strong medication management by labeling doses and storing them where you can reach them fast.
Clean cuts right away to support wilderness hygiene, then cover them so dirt stays out. You should also carry gloves, hand sanitizer, and a small wipe packet for quick cleanup. Check your kit before every trip, replace used items, and learn basic treatment for sprains, scrapes, and burns. Whenever your group knows the basics, everyone feels safer, calmer, and more ready.
Weather And Evacuation
As the sky turns dark fast, your best move is to stay calm and make a clear plan. Check the forecast before you leave, then watch the clouds, wind, and temperature all day.
Practice microclimate awareness, because a sunny ridge can turn stormy while a shaded valley stays cold and wet. Share your route with a trusted friend, and mark evacuation routes on your map before you start.
Should lightning, flooding, or heavy snow builds, you’ll know where to go without panic.
- Pack a small emergency shelter and headlamp.
- Keep your phone, whistle, and map easy to reach.
- Move with your group and agree on a meeting spot.
Whenever you act promptly, you protect everyone and keep the trip steady, even whenever nature gets moody.
Set Up Camp Safely
Before you settle in for the night, pick a flat spot that sits well away from dead trees, loose rocks, and water that could rise should it rains. Clear sharp sticks, then place your tent on firm ground so you’re not wobbling all night.
Keep your kitchen area separate from your sleeping space, and follow campfire etiquette through using only allowed fire rings and keeping flames small. Once you finish, drown the fire fully and stir the ash until it’s cold.
Store food, trash, and scented items in a bear-resistant bag or locker, because campsite wildlife management starts with smart habits. Should you hear rustling, stay calm and never feed animals.
Finally, check that guy lines are visible so no one trips after dark. You’ll rest easier whenever your camp feels neat, safe, and shared with care.
Train Your Body Before You Go
Training your body ahead of time can make a multi-day backpacking trip feel far less scary and a lot more fun. You don’t need to turn into a machine; you just need steady progress. Use progressive overload by hiking a little farther, climbing more hills, or adding pack weight each week. That helps your legs, lungs, and shoulders adjust without shock.
- Walk with your loaded pack on local trails.
- Add mobility drills for hips, ankles, and back.
- Practice stair climbs or hill repeats after work.
- Rest when your body feels sore or tight.
These small steps build confidence, and they help you join the trail crew feeling ready, not rushed. Strong prep also makes each mile feel more like your expedition and less like an exam.
Tell Someone Your Backpacking Plan
You’ve done the hard work to get your body ready, and now it’s time to make sure someone else knows where you’re headed. Tell a trusted friend or family member your route, start and end dates, and whenever you expect to check in. Share your trailhead, campsite plans, and any side trips you could take.
That way, you build a small safety net around your outing, and your people can feel close even whenever you’re out under the trees. Save your details in family notifications so everyone stays on the same page. It also helps to keep digital backups of your plan on your phone and in the cloud. Should your route change, update them fast. A few clear messages now can bring real peace later.
Final Backpacking Trip Checklist
Now that your plan is set, it’s time to do one last walk-through and make sure every small detail is in place. You’re close, and this check can calm your nerves before you hit the trail. Review your gear checklist and pack only what you’ll truly use. Then, compare it with the weather, your food, and your water plan.
- Confirm route markings on your map and phone.
- trial your headlamp, stove, and water filter.
- Recheck boots, socks, and layers for comfort.
Next, place your map, snacks, and initial-aid kit where you can grab them fast. Also, tell your hiking buddy what you altered. Whenever you finish, you’ll feel ready, steady, and part of the backpacking crew.
Frequently Asked Questions
How Do I Prevent Blisters on Long Backpacking Days?
You don’t need fancy gear—just Proper socks and Foot care. Keep your feet dry, trim nails, and stop promptly for hot spots. You’ll stay comfortable, hike longer, and feel like you belong out there.
What Should I Do if I Encounter Wildlife on the Trail?
Stay calm, keep your distance, make noise, and carry bear spray. Back away slowly, never run, and give wildlife room. You’re part of the trail community, so protect yourself, the animals, and fellow hikers.
How Do I Keep My Backpack Organized During the Hike?
Before chaos hits, you’ll win by using a smart pack layout: create gear zones for food, layers, and essentials. You’ll reach in fast, stay calm, and feel like part of the trail crew.
What Apps Help With Backpacking Route Planning?
You can use AllTrails, Gaia GPS, and CalTopo to plan routes. They give you offline maps and elevation profiles so you will feel prepared, connected, and confident with your trail crew.
How Do I Recover Quickly After a Multi-Day Backpacking Trip?
Rest, hydrate, and eat well, and your body will reset like a trail ember finding dawn. Do gentle stretching routines, prioritize nutritional replenishment, sleep deeply, and lean on your hiking crew for support.