
Trail markers guide hikers with colors, shapes, arrows, and numbers. They show when to go straight, turn left or right, or stop and check the map. Faded posts, shared paths, and junction signs give clues that prevent wrong turns. Knowing common marker types speeds route reading and boosts confidence on trails. This article explains how to spot and interpret those signs so following a route feels simple and safe.
What Trail Markers Tell You
Trail markers can quietly point you in the right direction, and once you learn how to read them, the whole trail feels less confusing.
You start to notice how each mark helps you stay with the group, even whenever the path bends or the trees close in.
Some markers show where the trail continues, while others warn you that you’ve drifted off course.
Good blaze maintenance keeps those signs clear, so you can trust them whenever you need them most.
The marker materials also matter, because paint, wood, or metal can weather at different speeds.
Whenever you understand what a marker is telling you, you feel calmer, safer, and more connected to every hiker who’s followed that same route before you.
Learn the Main Blaze Colors
A few main blaze colors can make a big difference whenever you’re trying to stay calm and sure of your way. You don’t need to guess alone; these colors usually speak a simple code that helps you feel like part of the trail community.
- White often marks the main path.
- Blue usually points to a side route.
- Red can show a harder connector or boundary.
- Yellow often signals a loop or local trail.
Because color psychology shapes how you notice each mark, bright paint stands out fast on bark and rock. That helps you read the trail without stress.
Good trail etiquette means you keep your eyes on the blazes and stay on course, so everyone shares the path with confidence.
Spot Directional Trail Signs
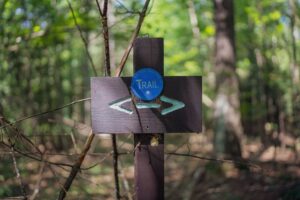
Upon reaching a fork or a junction, look for directional signs with arrows that show which way the trail continues.
You’ll also notice distance markers, which help you judge how far you’ve gone and how much farther you have to travel.
These signs can save you from second-guessing yourself, so you can keep moving with more confidence.
Identifying Direction Arrows
Spot a directional arrow, and you’ll know the trail is trying to help you move with confidence. You’re not alone whenever you pause to read it; every hiker has needed that quick check. Arrow psychology matters because the shape feels direct and calming, so you can trust the next step. Good arrow maintenance also helps, since faded paint or broken signs can stir doubt.
- Follow the point, not the post.
- Match the arrow with the trail width.
- Notice whether it leans toward a turn.
- Recheck after crossings or junctions.
Whenever you read arrows well, you stay with the group’s rhythm and keep the walk smooth. That little symbol can feel like a friendly nod from the trail, and honestly, that’s a welcome sight.
Noticing Trail Distance Markers
Distance markers do more than count miles, because they help you judge your pace and stay calm on the trail. Whenever you spot one, pause and read it before you hurry on. You’ll know how far you’ve gone, how much is left, and whether you should save energy for the next climb.
In case a sign points to a shelter, water source, or junction, use that clue to stay with your group and keep good trail etiquette. Also, watch for faded paint, broken posts, or missing tags, since marker maintenance affects what you can trust. Whenever a marker seems unclear, slow down and compare it with the map. That small habit helps you feel prepared, and it makes the whole hike feel exactly right.
Read Trail Junction Signs
At a trail junction, the sign does more than point you in a direction, it helps you stay calm and keep your bearings. You can read it like a friendly map, and you don’t have to rush.
First, check the trail names and destinations. Then, notice the arrows, because they show which path belongs to your route. Next, look for shared-use notes, since multi user etiquette matters whenever hikers, bikers, and riders meet. After that, scan for seasonal foliage warnings, because leaves or snow can hide the ground.
- Match the name.
- Follow the arrow.
- Respect shared space.
- Notice weather clues.
Whenever you pause for a moment, you help everyone feel safer, and you stay part of the trail community.
Follow Numbered Trail Markers
Whenever you follow numbered trail markers, watch the trail number sequence so you know you’re still on the right path.
Match each marker to the one before it, and you’ll spot a missed turn before it turns into a long detour.
Should the numbers stop lining up, pause, check your map, and let the trail guide you back on track.
Trail Number Sequences
A clear trail number can feel like a small promise, especially once the path starts to twist and the trees all look alike.
Whenever you read trail number sequences, you give yourself a steady guide and a little peace of mind.
These numbers often carry trail heritage, so they can help you feel part of the same path others have trusted before you.
Even provided marker decay has faded the paint, the sequence can still lead you on.
- Read the numbers in order.
- Stay with the same count as you hike.
- Watch for missing or worn markers.
- Trust the next clear number ahead.
In case one sign is weak, the next one often picks up the story.
That steady pattern helps you feel less alone out there.
Route Marker Matching
Next, you can match each route marker with the number on your map or guide so the trail keeps making sense even as the path feels confusing. As soon as the sign says 4, you know you’re still with your group, not wandering off alone. That simple check builds confidence and keeps you calm.
| Marker | Meaning |
|---|---|
| 4 | Stay on the shared route |
| 7 | You’re nearing a junction |
| 9 | The next turn is close |
You’ll notice trail tendency too. Some paths place markers after bends, while others hide them near rocks or trees. Learn that pattern, and you’ll spot the next clue faster.
Marker psychology helps here, because bright numbers and steady spacing tell you you’re on track. That little signal can feel like a friendly nod from the trail, and you belong out there.
Understand Common Trail Symbols
Trail symbols can look small and easy to miss, but they do a lot of heavy lifting once you know what they mean. You’ll start spotting them like part of your hiking crew, and that feels good. Their symbol origins often come from local land use, park history, or older map styles, so each mark carries a little story. Seasonal variations can also change what you see, since snow, rain, or leaf cover might hide or alter signs.
- Arrows point you toward the next turn.
- Blazes show you which path to stay on.
- Icons warn you about bikes, horses, or shared areas.
- Color bands help you match the right trail family.
When you read these symbols calmly, you fit in faster and worry less.
Check Distance and Time Markers
Distance and time markers help you turn a long trail into something your brain can actually manage.
Whenever you read them, you can see how far you’ve gone and how much farther you need to go, which calms that “are we there yet?” feeling.
Use them for estimating pace so you can match your energy to the hike, not just your hopes.
Provided a sign says 2 miles in 1 hour, you can plan breaks and water stops with less guesswork.
You can also use visual pacing by comparing the trail’s shape, your steps, and the posted time.
That makes each section feel more doable, and you stay in the group rhythm instead of rushing or lagging behind.
Little numbers can bring a lot of peace.
Notice Changes in Marker Patterns
After you’ve used the mile markers to judge pace, start looking for the way those markers behave along the route. Whenever you notice steady spacing, you can relax into the rhythm of the trail and feel like you belong there. Should a marker suddenly fades, shifts color, or appears twice, that usually points to seasonal repainting or changes in maintenance schedules. Pay attention to fresh paint, worn edges, and signs that look newer than the rest.
- Repeated symbols might confirm you’re still on the right path.
- Faded posts can signify older upkeep.
- Bright, crisp marks often show recent care.
- Missing signs can hint at a crossing or change nearby.
These patterns help you read the trail with calm confidence and stay connected to the route around you.
Use Trail Markers With a Map
Use your map and trail markers together so you can see where you’re and where you’re headed.
Match each marker to the map, then check that the direction on the sign still points you along the right path.
As you reach a junction, look for nearby landmarks on the map so you can confirm you’re on the correct trail and keep moving with confidence.
Match Markers To Map
Once you spot a trail marker, line it up with the map so the path makes sense in your head. Start by checking map orientation, then compare the marker with the symbol legend so you know what you’re seeing. This small habit helps you feel steady, even though the woods look busy.
- Find the marker on the trail.
- Match its shape or color to the legend.
- Trace that point on the map.
- Notice nearby bends, crossings, and landmarks.
If you do this, you and your hiking group can stay in sync without guessing. It’s like sharing a quiet inside joke with the trail: the signs start making sense, and you feel more at home out there.
Keep the map open, breathe, and let each marker confirm where you are.
Confirm Trail Direction
As the trail starts to split or bend, you can calm that “which way now?” feeling by checking the marker against your map. You’ll stay oriented faster whenever you match the arrow, blaze, or symbol with the line you expected to follow. Should the marker point elsewhere, pause and compare the map, then adjust your direction before you drift off course.
This simple habit supports trail etiquette, because you won’t wander where others didn’t intend you to go. It also helps you keep pace with your group, which makes everyone feel included. A quick compass calibration can add extra confidence whenever the path looks unclear. Once you trust both the sign and your map, you move with ease, and the trail feels a little more welcoming.
Note Junction Landmarks
At a trail junction, the landmarks around you can tell the same story as the signpost provided you know how to read them. You’re not guessing alone; you’re joining a shared trail rhythm.
- Spot big rocks, bridges, or stream bends near trail junctions.
- Match each landmark with your map before you move on.
- Use landmark spotting to confirm which path keeps you on route.
- Assuming the view feels off, stop and check again together.
Small details matter, and they can save you from a long wrong turn. Once you notice a split, look for worn ground, blazes, or nearby trees that line up with your map. That calm check keeps you steady and helps you feel like part of the trail community.
Handle Missing or Confusing Signs
Whenever a trail marker goes missing or a sign makes no sense, take a breath and slow down, because panic usually causes bigger mistakes.
You can stop, look back, and check for the last clear mark before you move again. Then compare the path, the terrain, and your map so lost wayfinding doesn’t snowball.
Should the route still feel fuzzy, use improvised markers like a rock pile or a bent twig to mark where you turned, so you can retrace your steps with less stress. You can also ask nearby hikers whether they’ve seen the right trail, and most folks will help.
Stay calm, trust your notes, and keep choosing careful steps over rushed guesses.
Read Trail Markers on Shared Paths
On shared paths, you’ll often see symbols that tell you who can use the trail and where you fit in. Whenever a sign or marker gives the right-of-way, you should slow down, yield kindly, and keep an eye out for others.
In that situation, you stay on course without turning a nice hike into a trail traffic jam.
Shared Path Symbols
Shared path symbols can feel tricky at initially, but they usually make more sense once you know what to look for. You’ll often see shared use symbols that show hikers, bikers, and walkers all belong on the same route. When you spot them, pause and read the sign with calm focus.
- Look for images, not just words.
- Notice trail arrows beside the symbol.
- Match colors with the route map.
- Follow multi user etiquette signs, since they remind you to keep your space respectful.
These markers help you stay connected to the path and the people around you. Should you’re unsure, slow down and check the next post. That small pause can keep your walk smooth and friendly.
Yielding Right-of-Way
Once you know who belongs on a shared path, the next thing to watch for is who should yield. You’ll usually give way to hikers going uphill, horseback riders, and faster users whenever signs or trail markers say so. This isn’t just courtesy etiquette; it also follows legal protocols that help everyone feel safe and welcome.
Should you be biking, slow down initially and let others hear you before you pass. In case you’re walking, step aside where the trail widens and smile should you can. Clear eye contact and a calm voice can turn an awkward moment into an easy one. As you respect the order, you help the whole group share the trail with trust, comfort, and a sense that everyone belongs.
Staying On Course
Trail markers can keep you from drifting off course whenever the path starts to twist, split, or disappear under leaves. On shared trails, you and your group can stay steady by reading each sign before you pass it. That helps with pace control, because no one needs to rush to catch up after a missed turn.
- Match the marker color or shape to the trail map.
- Pause at junctions and let everyone check the route.
- Watch for faded paint, stacked rocks, or small tags.
- Should group interactions get messy, speak up promptly and point ahead.
Whenever you stay alert together, you protect the whole crew’s rhythm. That makes the hike feel calmer, friendlier, and a lot less like a guessing game.
Stay Safe on Unmarked Sections
As the marked path disappears, you need to slow down, stay calm, and start reading the land around you with care. Check your map, compass, or phone before you move again, then match ridges, streams, and open gaps to what you see.
For emergency wayfinding, pick one clear landmark and keep it in sight. In case you need improvised wayfinding, follow a safe line such as a valley edge or a ridge crest, not a shortcut through thick brush.
Stay close with your group, speak up should you feel unsure, and let others know what you notice. Make small choices, then pause and recheck often. In case the ground looks confusing, trust caution over hurry. You belong out here, and smart steps help everyone stay steady together.
Know When Trail Markers Change
Sometimes the smallest signs on a trail can tell you the biggest story, especially once they stop matching what you expected. As soon as you notice a seasonal marker or a fresh blaze, pause and read the change as a friendly heads-up. Trails shift with weather, storms, and work crews, so a new mark often points you toward a safer path.
- Look for fresh paint or new posts.
- Notice arrows that replace older symbols.
- Follow signs for temporary reroutes with care.
- Trust your route only after the markers line up.
If a marker looks faded, bent, or moved, you’re not lost. You’re seeing the trail adapt, and you can adapt too. That little shift helps you stay with the group feeling hikers count on.
Practice Reading Trail Signs Before You Hike
Before you lace up your boots, take a little time to read trail signs at home so they feel familiar as you’re on the path. You can print maps, study photos, and match symbols with their meanings. Then try practice quizzes to assess yourself without pressure.
As you get better, move to simulated hikes with a friend or in your yard. Point out warning signs, distance markers, and direction arrows as though you were there. This builds confidence, and it helps you trust your choices once the trail gets busy.
Should you be unsure, pause and read again. That’s normal, and every hiker starts there. With a little practice, you’ll feel like part of the trail community, ready to move with calm, steady steps.
Frequently Asked Questions
How Do Trail Markers Differ Between National and Local Parks?
You’ll notice national parks usually use more standardized markers, while local parks often vary more because of different funding, maintenance standards, management priorities, and local cultural influences, so you’ll need to stay alert and adapt.
Can Trail Signs Indicate Seasonal Closures or Weather Hazards?
Yes; trail signs can clearly signal seasonal advisories and weather warnings, so you’ll stay safe, savvy, and supported on shared paths. Watch posted notices, respect closures, and follow them to protect yourself and your hiking community.
What Should I Do if Markers Seem Faded or Vandalized?
You should stop, double check your map or app and avoid guessing. Carry emergency supplies, report coordinates to a ranger or trail group and trust your hiking community to help keep everyone safe.
Are Trail Markers Standardized Across Different Hiking Organizations?
No, you cannot assume they are standardized. Like a patchwork quilt, trail markers vary by organization, region, and international differences. You should check local guides and respect signs from private landowners so you remain welcome on every path.
How Can I Identify Markers on Night Hikes or in Low Light?
You can spot markers at night by scanning ahead with a headlamp, using reflective gear, and carrying glow sticks for backup. You will feel more confident with your trail group once you plan, pause, and look carefully.