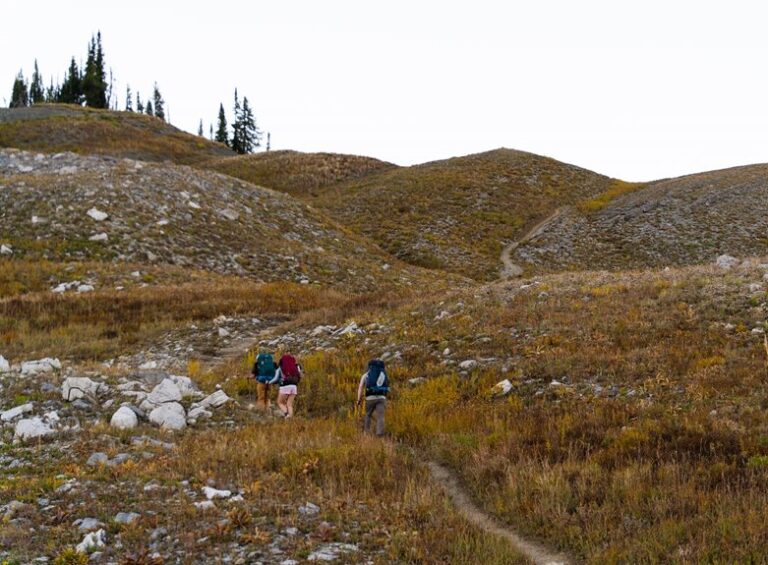


Get calm, breathe slowly, and stop moving to avoid wasting energy. Look back to the last spot you were certain of and scan for familiar landmarks like rock formations, trail bends, signs, or the sound of water. Check a map, compass, or GPS right away to reorient yourself. If hurt or truly unsure, stay put and use a whistle or mirror to signal rescuers. Conserve energy, stay visible, and make deliberate choices to increase the chance of being found.
Stop and Stay Calm
In case you realize you’re lost, stop right away and take a slow breath. You don’t need to panic or rush. Your job is to help your mind catch up with your feet.
Stand still, relax your shoulders, and let your heart slow down. Use breathing techniques like inhaling for four counts and exhaling for six. That simple rhythm can steady your thoughts and bring emotional grounding whenever fear starts to spin.
Should your brain feel noisy, name five things you can see or touch. This keeps you present and less shaken. You’re not failing, and you’re not alone out there. Calm choices start once you give yourself a moment. Once you feel steadier, you can consider more clearly and move with care.
Check Your Last Known Spot
Now, trace your steps back to the last place you know for sure. That last waypoint gives you a solid starting point, even assuming the trail feels fuzzy now.
Look for memory cues that marked your path, like a snapped twig, a bright rock, or a bend in the trail you recall passing. Say each clue out loud provided it helps you focus.
You’re not alone in this; hikers lose the line sometimes, and that’s okay. Check your pack, map, and water, then match what you recollect with where you were moving.
Keep your thoughts steady and move slowly, because rushed guesses can pull you farther off track. Should you can name the spot clearly, you’ll feel more anchored and ready for what comes next, together.
Reorient Using Nearby Landmarks
Use the ground around you like a simple map.
Initially, look for natural landmarks you can trust, like a bold ridge, a stream bend, a lone pine, or a rock face. Match what you see to your memory of the trail, and let those clues calm your mind.
Then check the sun and use shadow wayfinding to tell which direction you’re facing. Should the shadows shift left, right, or long, you can read the light and stay oriented.
Next, listen for helpful sounds, such as water or road noise, because they often point to familiar ground.
Keep your steps slow and your eyes steady. You’re not alone out there, and these small clues can help you feel back in control.
Don’t Wander Farther Off Trail
Staying put is one of the smartest moves you can make while you feel turned around. When you stop, you keep your energy, your signal, and your calm. Don’t wander farther off trail just to “check” the next bend. That choice can deepen confusion fast.
Instead, use avoid disorientation techniques: face a landmark, note the trail edge, and watch for signs you missed. Should you feel tempted to push through brush, resist curiosity detours, even in case they look like a quick shortcut. Small side trips can turn into big problems.
You’re not quitting; you’re protecting yourself. Take a breath, trust your last known path, and give yourself a better chance to reconnect with the route and the people who care about you.
Decide Whether to Stay Put
Should you’re lost, the initial big choice is whether to stay where you’re or move on.
First, assess injury. If you’re hurt, weak, or shaken, staying put can help you save energy and avoid making things worse.
Next, evaluate weather. Dark clouds, wind, or cold can turn a small problem into a hard one fast.
If you’re in a safe spot, near water, or off the trail but not in danger, waiting might be the smarter move. You’re not failing by pausing. You’re giving yourself time to consider clearly and protect your group spirit.
If the area feels unsafe, choose a short, careful move to better ground. Trust calm choices, not panic, because steady steps keep you safer.
Signal for Help Safely
Once you’ve chosen a safer place to wait, the next step is to get attention without putting yourself at more risk. You’re not alone out there, and calm signals can help rescuers find you faster. Use whistle techniques in short bursts of three, then pause and listen. Should you have a mirror, try mirror signaling whenever sunlight hits it, aiming toward open sky or a distant trail. Keep your movements steady so you don’t waste energy.
- Blow the whistle only when you can stay still.
- Flash the mirror in brief, clear bursts.
- Wave bright clothing from a safe spot.
Provided you hear voices or engines, answer with sound and light together. That simple pattern makes your signal easier to notice and helps you feel a little less stuck.
Use Your Map, Compass, or GPS
Initially, stop and read your map so you can match the trails, ridges, and landmarks around you. Then check your compass to make sure you’re facing the right direction, and use your GPS to confirm your location should you have a signal or a saved map.
Once these tools agree, you can pick a safe path forward with a lot more confidence and a little less panic.
Reading The Map
A quick look at your map can turn panic into a plan. You’re not alone, so breathe and find the trail you last trusted. Read the route symbols initially, because they show paths, camps, and water. Then check contour interpretation to see hills, valleys, and steep spots. That helps you match the land around you with the paper in your hand.
- Find your current spot, provided you can.
- Match nearby landmarks to the map.
- Use your GPS screen to confirm what you see.
Should the map and ground disagree, slow down and compare again. Small details matter, and you don’t need to rush. With each careful look, you build confidence and stay connected to the group ahead.
Compass Direction Check
Whenever your map starts to feel fuzzy, use your compass or GPS to bring the image back into focus. Hold your compass flat and away from metal gear, then line up the needle with north. Check magnetic declination, because even a small angle can nudge your direction off trail.
Should your map show a ridge or stream, turn until the map and terrain match. That simple step can calm your nerves fast.
Keep up with compass maintenance, too. Wipe the case, close the cover, and store it safely so it stays ready whenever you need it most.
In case you use GPS, compare its reading with your map before you move. You’re not alone out there, and a careful check can help you feel steady again.
GPS Location Confirmed
Should your compass or map now points you back on track, take a slow breath and confirm your GPS location before you move again. You’re not alone out there, and this quick check can steady your nerves.
First, look for strong satellite visibility in an open spot, then wait a moment for a cleaner signal. Next, compare your pin with nearby trails, streams, or ridge lines on your map so you trust your location accuracy. If the reading still looks off, don’t rush forward.
- Stand still and save battery.
- Recheck the route with your compass.
- Mark the spot and choose the safest path.
When your devices agree, you can move with more confidence and keep your pace calm.
Stay Warm and Visible
Should you’re stuck on the trail, protecting your body from cold and helping others spot you can make a big difference fast.
Put on layered clothing right away, and keep a dry layer closest to your skin provided you have one. Zip up, cover your head, and tuck hands in sleeves whenever the wind bites.
In case you carry reflective gear, clip it to your pack or hold it where light can catch it. Use bright fabric, a whistle, or a mirror to grab attention without wasting energy.
Move to open ground only provided it’s safe, then stay still and save heat. You’re not alone out there, and simple choices can help rescuers find you sooner while you stay calmer and safer.
Prevent Getting Lost Again
To keep from getting lost again, update your route plan before every hike so it matches the weather, trail conditions, and your own energy.
Bring wayfinding tools like a map, compass, or phone app, and make sure you know how to use them before you step onto the trail.
Then share your trip details with someone you trust, so in case plans change, someone else knows where you meant to go.
Update Route Plans
Once you’re safe and back on track, update your route plan so the same mistake doesn’t catch you again. Start by marking where you went off course and why. Then adjust your map with route alternatives and contingency timelines so you’ve got a clearer backup should weather, fatigue, or trail confusion shows up again. You’re not failing; you’re building a smarter plan with the rest of the hiking crew.
- Pick landmarks that are easy to spot.
- Note the turn where you hesitated.
- Share the revised plan before you hike.
When you tighten the plan now, you give yourself more confidence later. That small reset helps you feel ready, supported, and less likely to wander into another awkward “where am I?” moment.
Carry Navigation Tools
Carry the right wayfinding tools before you head out, because a small backup can save a big headache on the trail.
Keep a map in a pocket you can reach fast, and choose waterproof maps so rain won’t turn them to mush.
Bring a compass too, and practice using it at home so it feels natural when nerves kick in.
In case you rely on a phone, pack a charger and spare batteries, because a dead screen can’t point you anywhere.
Then, check your tools at each break so you stay confident and calm.
Whenever the path gets tricky, these helpers keep you connected to the route and to the group feeling you want out there.
Small habits like this make you safer and less alone.
Share Trip Details
Before you hit the trail, tell at least one trusted person exactly where you’re going, at what time you expect to be back, and which route you plan to take. This simple habit helps your people look after you should plans change, and it can calm your own nerves too.
- Leave itinerary notes with trail names and camp spots.
- Share contacts for your hiking partner and emergency help.
- Update your person whether weather, pace, or route changes.
When you leave itinerary details, you build a safety net that feels like the group has your back. Also, in case something goes wrong, clear share contacts information lets rescuers reach the right people fast. You don’t need a big plan, just a clear one.
That small step keeps you connected, supported, and easier to find.
Frequently Asked Questions
How Can I Tell if I’M Truly Lost or Just Temporarily Disoriented?
In case you’ve missed trail markers and can’t match your compass skills to the terrain, you’re likely more than just turned around, like a million miles off. Pause, breathe, backtrack calmly, and trust your instincts.
What Should I Pack in a Hiking Emergency Kit Before Leaving?
Pack a compact initial aid kit, route tools, extra water, snacks, a whistle, flashlight, lighter, and emergency blanket. You will feel more prepared, and your hiking crew can count on you in case plans change.
How Do I Estimate How Long I Can Stay Safe Without Water?
You gauge water limits like a lantern in a dry cave: heat effects shorten your clock. In cool shade you could last longer; in sun or with exertion act within hours not days and stay with your group.
What Should I Do if I’M Lost After Dark?
Stop moving, use your flashlight sparingly, and scan for night wayfinding landmarks. Stay calm, signal for help, and conserve battery. You are not alone; team up with your instincts, shelter nearby, and wait for dawn.
How Can I Contact Rescuers if I Have No Cell Service?
You cannot call directly, so you will need a satellite messenger or personal locator transponder. Keep them ready; your signal could be the link that brings you back to your people, fast.