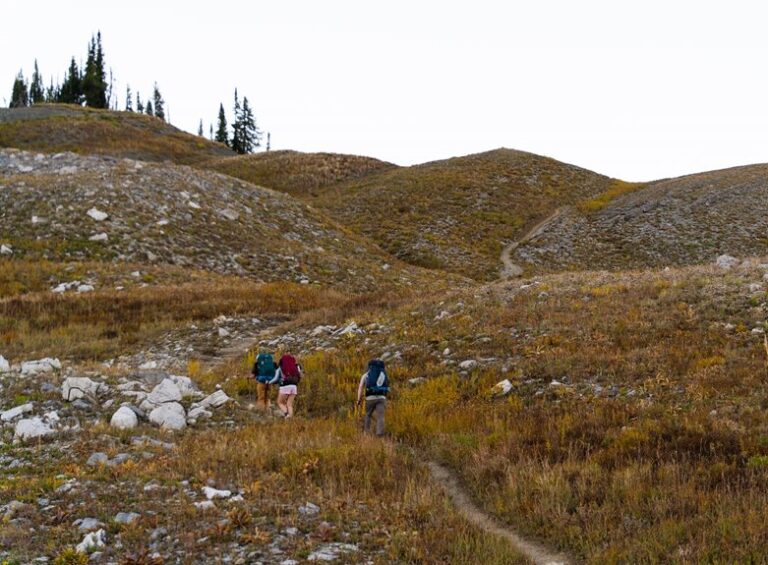


Hiking alone can be liberating and safe when planned thoughtfully. Choose a route that matches skill level, daylight hours, and endurance. Share your plan with someone who can raise the alarm if needed. Check weather, carry proper gear, and pack extra food, water, and layers. Have a clear plan for handling rough trail conditions, low energy, or unexpected delays.
Choose a Safe Solo Hiking Trail
Whenever you’re hiking alone, the trail you choose matters just as much as the gear you pack. Pick a route that matches your trail difficulty comfort, so you can enjoy the walk without feeling rushed or swamped.
Beginner-friendly neighborhood trails often give you a calmer start because they’re well used, easy to follow, and close to help should you need it. Look for clear signs, steady footing, and daylight-friendly loops instead of remote paths that ask too much too soon.
You deserve a hike that feels steady and welcoming, not like an evaluation. Whenever you choose wisely, you give yourself room to breathe, notice the trees, and build trust with every step. That confidence makes the whole solo experience feel a lot more like yours.
Plan Your Route and Share It
Map your route before you step onto the trail, and use a trail app or paper map to mark key turns, water spots, and exit points.
Then share your full plan with someone you trust, including where you’re going, provided you’ll start, and provided you expect to be back.
Set check-in times too, so should your schedule shifts, someone knows to worry and can act fast.
Route Mapping Basics
Before you head out alone, take a few quiet minutes to plan your route and share it with someone you trust.
Start with a paper map or app, and trace the trail from start to finish.
Check map symbols so you know where water, camps, and road crossings sit.
Then study elevation profiling to see where steep climbs or long descents might slow you down.
Choose a route that matches your pace, daylight, and comfort level.
Should two paths look close, pick the one with clearer signs and easier turns.
As you map, notice bailouts and alternate exits too.
That way, you won’t feel boxed in should weather shifts.
A good route gives you confidence, and confidence makes solo hiking feel a lot less lonely.
Share Trip Details
A little planning can spare you a lot of worry once you’re out on the trail.
Before you leave, share your route with someone you trust. Give them the trail name, trailhead, loop or out-and-back plan, and your start and end points.
Include nearby landmarks and any side paths you could take. This kind of route sharing helps people know where you meant to be, and it can bring real peace of mind.
Keep privacy considerations in mind, too. You don’t need to post every detail to a group chat or social feed.
Share only what helps the right person understand your plan. Should you change your path, update them before you lose signal.
That small step keeps your solo hike feeling supported, not lonely.
Set Check-In Times
Set check-in times before you hit the trail so someone knows at what time to expect word from you.
Pick a few moments that match your route, like after the initial mile, at lunch, and once you reach camp. Then put them in your phone schedule so they’re easy to follow.
Should your plans change, send a quick update as soon as you can. That small message can calm worry and help your people stay on the same page.
Also, tell them your privacy preferences, such as whether you prefer texts, calls, or both. You still keep your space, and they still know you’re okay.
A simple check-in routine builds trust, and it helps you feel connected, even when the trail gets quiet and the trees start acting like nosy neighbors.
Tell Someone Your Hiking Plans
Before you head out, tell someone your full hiking plan, including your route, trail name, and expected return time.
Set clear check-in times so they know when to worry should they don’t hear from you.
Also, leave emergency contacts with them, because a little planning can make your solo hike feel a lot safer.
Share Your Route
With a quick message or a shared map, you can give someone a clear idea of where you’ll be and at what time you expect to return.
Share the exact trailhead, your planned loop or out-and-back path, and any side routes you could take. That small step helps your people feel close, even while you’re hiking solo. It also supports trail etiquette, because others can guide help to the right place should it be needed.
Should you change your route, let someone know before you keep going. You can also jot landmarks, parking areas, and water stops so your plan stays easy to follow.
Clear route details make emergency signaling faster, since rescuers won’t waste time guessing. Once your path is known, you hike with more calm and more confidence.
Set Check-In Times
A quick check-in time can make your solo hike feel much safer and a lot less stressful.
Before you leave, tell someone when you’ll send scheduled updates and how often you’ll do it. Pick a check in frequency that fits your trail, pace, and daylight.
For a short hike, one message at the start and one at the finish could work. For a longer trip, add a midday text or two.
Keep your plan simple so you can stick to it without feeling rushed. Should your route changes arise, let your person know as soon as you can. That way, they won’t worry once you take a longer break.
Clear timing helps you stay connected, and it gives you a calm, familiar safety net while you’re out there.
Include Emergency Contacts
Next, make sure someone has the full image of your hike, not just your check-in times. Share your route, trail names, start point, finish point, parking spot, and expected return. Then give them your emergency contacts, plus the number for the local ranger station if available. That way, should plans shift, they can help fast.
- Text your route map.
- Add a backup trail.
- Note car details and plate.
- Save it in digital registries or a shared note.
You don’t need a big circle; one steady person can be your safety net. Whenever you hike with a group, tell them too, so everyone stays in the loop. Once someone knows the plan, you feel less alone out there, even before the initial step.
Check the Weather Before You Leave
Before you head out on the trail, check the weather as carefully as you check your shoes, because the sky can change your whole day in minutes. You belong on the trail, and a smart forecast helps you stay calm and confident. Look at forecast timing, not just the current icon, because rain or wind could arrive later. Also, practice microclimate awareness near ridges, valleys, and lakes, since local weather can shift fast.
| Weather check | What it means |
|---|---|
| Morning update | Good for start time |
| Midday shift | Watch for storms |
| Local terrain | Expect quick changes |
If clouds build or thunder grows, turn back sooner. You don’t need to prove anything to anyone out there. A safer choice still feels like your outing, and it keeps your solo hike in the right hands: yours.
Pack Essential Solo Hiking Gear
Whenever you hike alone, you need gear that helps you stay on track and stay calm in case plans change.
Pack wayfinding essentials like a map, compass, or charged GPS, and keep them where you can reach them fast.
You should also bring emergency supplies such as a primary aid kit, a whistle, extra food, water, and a light layer, because small problems can grow quickly whenever no one else is there.
Navigation Essentials
Under a clear sky or a sudden bend in the trail, wayfinding gear can turn a lonely hike into a safer, calmer trip. When you pack navigation basics, you give yourself steady ground and a stronger sense of belonging outdoors. Bring these four tools:
- A paper map for quick route checks
- A compass for simple compass use
- GPS basics on your phone or device
- A note on altitude effects, since steep climbs can change pace and judgement
First, study map reading before you leave, so trail junctions feel familiar. Then, match the map with your compass and try out your GPS while you still have signal.
As the land rises, watch for altitude effects that can slow you down and blur choices. With these tools, you’ll feel less alone and more prepared.
Emergency Supplies
Even a short solo hike can turn shaky fast, so you’ll want emergency supplies that help you stay calm and keep moving. Pack a small primary-aid kit, extra water, a whistle, and a headlamp with fresh batteries.
Add a signal mirror and a personal locator so you can call for help should you get hurt or lost. Keep a lightweight emergency blanket in your pack, too, because cold can sneak up on you even on warm days.
After that, store a few high-energy snacks and a charged phone in a dry pouch. Then you’ll have tools that cover injury, darkness, and getting found.
Whenever you pack this way, you give yourself a real safety net, and that can make solo hiking feel a lot less lonely.
Stay Alert on the Trail
Staying alert on the trail can make all the difference should you hike alone, because your best safety tool is your own attention.
As you walk, keep your eyes moving and your mind trail etiquette. You belong out there, and awareness helps you share the path with confidence. Try to:
- Scan ahead for loose rocks, roots, and bends.
- Listen for voices, bikes, or rustling brush.
- Notice trail signs, markers, and side paths.
- Check in with yourself whenever the woods feel too quiet.
Whenever you maintain situational awareness, you catch small changes before they grow into problems.
Manage Food, Water, and Energy
Food, water, and energy can disappear faster than you expect on a solo hike, so plan for your body before it starts asking for help. Pack snacks you actually enjoy, like trail mix, jerky, or fruit, because familiar food can lift your mood while you’re hiking alone.
Sip water often, not just when you feel thirsty, and add electrolytes on hot or long days to support electrolyte balance. Next, consider calorie timing so you eat before you crash. A small snack every hour or two can keep your pace steady and your mind clear. Should you start feeling shaky, slow down and refuel right away. While you care for your own needs, you help yourself stay strong, calm, and ready for the trail ahead.
Watch for Wildlife and Trail Hazards
Once you’ve handled your food and water, shift your attention to the world around you, because the trail can change fast whenever you’re out there beside yourself. Scan ahead for movement, fresh tracks, and tucked-away brush where a seasonal animal might be feeding. Keep your pace calm, and give every sound room to tell you something.
- Notice claw marks on bark.
- Watch for loose rock and trail erosion near slopes.
- Step wide around mud so you don’t slip.
- Yield space should a deer, bear, or snake cross your path.
You’re part of the trail community out there, even whenever it feels quiet. Stay alert, trust your eyes, and move with care. That way, you protect your footing and respect the wild neighbors sharing the path.
What to Do if You Get Lost
In case you realize you’re lost, stop walking for a moment and take a slow breath, because panic can make a small problem feel much bigger.
Look around, notice your last clear landmark, and listen for nearby trails, water, or voices. Should you have a map, compass, or phone, use them together instead of guessing.
Stay put provided the path feels uncertain, and make simple signal strategies like bright clothing, whistle blasts, or three repeated calls.
Next, focus on psychological coping by naming what you see, feeling your feet on the ground, and telling yourself that you can handle the next step.
Then, save your energy, sip water, and keep your mind steady. Your calm choices help rescuers and fellow hikers find you faster.
Know When to Turn Back
Even the best lost-hiker plan can only do so much, so it helps to know at what point the safest move is to turn around. Once you watch for early signs, you protect your energy and keep the trail from feeling lonely or scary.
Trust your gut and check for these turnaround points:
- Dark clouds roll in fast.
- Your feet feel shaky or slow.
- The trail markers disappear.
- Daylight starts fading.
These moments aren’t failures. They’re smart signals that you’re part of a careful hiking crowd, even while you’re out there solo. Should the path feels off, you don’t need to prove anything. You just need to choose the safer line, head back, and give yourself another day to finish the hike with confidence.
Frequently Asked Questions
How Do I Find Solo Hiking Groups if I Want Company Sometimes?
You’ll find solo hiking groups through local meetups and guided outings; one in five hikers says company enhances confidence. Join trail clubs, apps, and park events so you can belong, share miles, and choose solitude anytime.
Is It Safe to Hike Alone With a Dog?
Yes, you can hike alone with a dog provided you plan well. You will need a reliable leash, know local leash laws, and consider wildlife training so you and your dog feel safer, connected, and prepared.
Should I Bring a Phone or a GPS Device?
Bring both if you can: your phone for everyday use and a satellite GPS for backup. You’ll fit right in with prepared hikers whenever you prioritize battery management, keep devices charged, and stay connected.
What Permits Do I Need for Solo Hiking?
You’ll need wilderness permits for protected areas and permission from private landowners if your route crosses private property. Check local rules, because one piece of paper can open the trail like a key and welcome you into the wild.
How Can I Reduce Anxiety When Hiking Alone?
You can reduce anxiety by using breathing techniques and trail visualization before you start, then keep chatting with yourself like a trusted friend; you are not alone, and each calm step helps you feel more connected.